Why is Cast Iron Pan the Most Loyal Friend of Campfire?
Cast iron pans are the only kitchen equipment that can tame the irregular and fierce heat of a campfire. The greatest feature of these pans is their high thermal mass; meaning once they absorb heat, they retain it for a long time and distribute it evenly across the surface. Even if the flames of the campfire fluctuate continuously, the thick bottom of the cast iron pan absorbs these fluctuations, preventing one side of the food from burning while the other side remains raw. Additionally, due to the porous structure of cast iron, it forms a natural non-stick layer over time known as "seasoning." This layer provides you with the comfort of a professional kitchen while cooking oily and high-protein meals outdoors. The durability of the cast iron pan is remarkable; a piece of wood falling on it or extreme heat does not deform it, but rather adds character.
How Should You Control the Heat of the Fire Precisely?
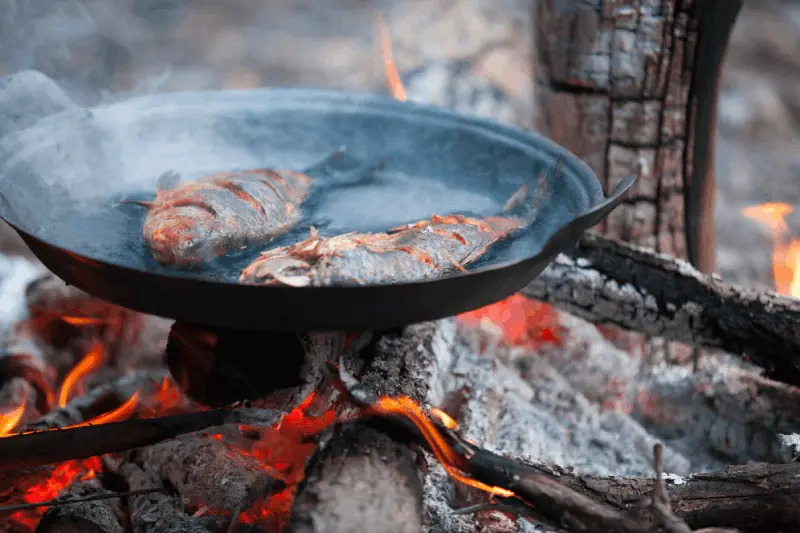
Controlling the heat at a campfire is not as easy as turning the stove knob, but a cast iron pan gives you a significant advantage in this regard. The most effective way to control the heat is to adjust the distance of the pan from the fire. Instead of placing it directly over the flames, positioning your pan over the embers provides a more stable heat. If you want to increase the heat, you can pull a few fresh embers under the pan, and if you want to reduce it, you can push the embers aside. You can test the heat by holding your hand about ten centimeters above the pan; if you can hold your hand there for more than two seconds, it is an ideal high heat for searing. About five seconds is medium, while eight seconds or more is suitable for slow cooking or simmering. This manual control, combined with the cast iron pan's ability to retain heat, yields excellent results.
How Should You Prepare Your Cast Iron Pan at Home Before Going Camping?
To have a seamless cooking experience in the wild, preparations actually start in your home kitchen. You should ensure that the "seasoning" layer of your pan is intact before going camping. If there are gray areas or slight rust spots on your pan, you should oil it with a thin layer of vegetable oil (flaxseed or grapeseed oil is recommended) and bake it in the oven at high heat for about an hour. This process creates a protective shield that prevents the metal's pores from being exposed to the elements. Also, make sure that the handle of the pan you will be carrying is covered or has a suitable handle system. Before going camping, lightly oil your pan and wrap it in a paper towel for transport, which prevents rust by cutting off air contact and also keeps your other camping gear clean.
Why Should You Prefer Cooking Over Embers Instead of Direct Flames?
The most common mistake made by novice campers is throwing the pot or pan directly into the rising flames. However, real flavor and controlled cooking are found in the glowing embers left after the flames die down. Flames can cause soot buildup on the outside surface of the pan and lead to unpredictable increases in heat; this results in the outside of your food burning while the inside remains raw. Embers, on the other hand, radiate a more even and homogeneous heat. The cast iron pan perfectly absorbs this deep heat emitted by the embers, creating an oven-like effect. If you are making meat or stew that needs to cook slowly, you should place your pan on a bed of embers and even put a few pieces of embers on top of the lid if your pan has one. This technique maximizes the potential of the cast iron by surrounding the heat from all sides.
What Oils and Techniques Should You Use to Prevent Sticking?
The sticking problem in cast iron pans usually arises from the wrong choice of oil or the pan not being heated sufficiently. Using oils with a high smoke point in a camping environment is crucial. Butter or extra virgin olive oil can burn at low temperatures, leaving a bitter taste; therefore, corn oil, sunflower oil, or ideally clarified butter (ghee) should be preferred. Before starting to cook, the pan must be thoroughly heated "empty." The pores of the heated metal expand and absorb the oil, creating a slippery surface. When you place the meat in the pan, do not try to flip it immediately; when the cast iron pan has seared the meat, it will naturally release from the pan. If the meat is sticking to the pan, it means it has not yet seared enough or the pan is not hot enough. Patience is as important as oil in using a cast iron pan.
Can Acidic Foods Be Cooked in Cast Iron?
This topic is one of the most debated among cast iron enthusiasts. Acidic foods like tomato sauce, wine, or lemon can dissolve the protective oil layer (seasoning) on the pan and may impart a metallic taste to the food. However, if the maintenance layer of your pan is very strong and you are not planning to leave the food in the pan for hours, short-term acidic cooking generally does not pose a problem. Making a quick tomato menemen at the campfire will not damage your pan. The key point to remember is to clean your pan immediately after cooking acidic food and lightly re-oil it. If your pan is new or its maintenance is weak, it is safer to avoid acidic foods or use an enamel-coated cast iron pan for such dishes.
How to Avoid Thermal Shock and Cracking of the Pan?
Although the cast iron pan appears to be as durable as a tank, it has a physical weakness: ... Thermal pan. Placing a very hot cast iron pan into the icy stream water at the campsite or suddenly pouring cold water over it can increase the tension inside the metal, causing the pan to crack or warp. This is a non-reversible hazard. After cooking, you should allow the pan to cool down on its own, slowly. If you need to use water for cleaning, make sure the water is warm or hot. Similarly, throwing frozen meat that has just come out of the freezer directly onto the very hot pan can create local thermal stress. Bringing your meat to room temperature (or the closest level possible in camping conditions) and cooking it that way will extend the life of your pan and ensure better cooking.
Is Using Soap for Cleaning Really a Taboo?
The long-standing myth that "soap should not touch cast iron" was actually valid for the harsh caustic soaps of the past. Today's mild dish detergents cannot easily remove the polymerized (bonded to the metal) oil layer on the pan. If your food at the campsite is very sticky, there is no harm in using a small amount of biodegradable detergent. However, if you prefer traditional methods, the best cleaner is coarse salt. Pouring some coarse salt into the pan and scrubbing it with a paper towel or cloth creates a sanding effect that removes food residues and preserves the natural structure of the pan. The most critical step to pay attention to after cleaning is to leave not a single drop of water on the pan. You should place the pan next to the fire to ensure it dries completely and then "seal" it with a thin layer of oil.
How Should One Deal with Signs of Rust in Nature?
Rust formation on a cast iron pan left wet by mistake or in the humid environment of the campsite may be unavoidable. If you see orange spots on your pan when you wake up in the morning, do not panic. Rust is not the end of your cast iron pan. To clean rust in camping conditions, you can cut a fresh potato in half and sprinkle salt on the rusty area to scrub it. The oxalic acid in the potato and the abrasiveness of the salt will dissolve the rust. If the situation is more serious, you can scrape the rusty part with sand or a hard stick and then rinse it thoroughly. After cleaning, immediately place the pan over the fire to heat it up and scrub it with plenty of oil when the pores open. This will stop the progression of rust and temporarily protect the surface. When you return home, you may need to perform more detailed maintenance.
When and Why Should Tripod Systems Be Used?
Placing a cast iron pan or pot directly over the coals can sometimes cause excessive heat. This is where camping tripods or hanging systems come into play. These systems allow you to adjust the distance of the pan from the fire with millimeter precision. Especially for dishes that require long cooking times, slow-cooked meats, or bread making, a hanging system is invaluable. When the pan is suspended in the air, heat passes underneath and provides a gentler cooking process. Additionally, in windy conditions, breaking the contact of the pan with the ground ensures that the coals below receive more oxygen and do not extinguish. If your ground is very uneven or wet, hanging your pan is the most logical choice in terms of safety and stability. Due to the weight of the cast iron pan, you should ensure that the hanger you are using is sturdy and well anchored to the ground.
How Should the Position and Rotation of the Pan Be for Even Cooking?
The campfire does not provide a circular and stable heat like home stoves; the heat intensity constantly changes depending on the direction of the wind and the position of the wood. Therefore, simply placing the cast iron pan over the fire and leaving it there can cause one side to burn. Rotating the pan a quarter turn every five minutes during the cooking process ensures that the heat is distributed more evenly across the surface. If one side of your pan is getting very hot, you can place thicker pieces of meat on that area and vegetables on the less heated areas. Although the cast iron pan conducts heat, if one side is in direct contact with the flames while the other side is exposed to cold wind, a significant temperature difference can occur. To prevent this situation, using windbreaks or surrounding the pan with stones to create a heat shield can significantly improve cooking quality.
How Are Baking Techniques Applied with a Cast Iron Pan Over a Campfire?
A cast iron pan is not only for sealing and frying; it is also an excellent oven. It is possible to make cornbread, cake, and even pizza over a campfire. For this, you can use the method of placing two pans together, known as "double skillet," or the technique of tightly covering the top of a deep pan with aluminum foil. In the baking process, having the heat source only underneath can cause the bottom to burn. Therefore, after placing the pan over the coals, you should also place a few glowing coals on top of the lid or foil to provide heat from above. The ability of cast iron to retain heat creates a moist and stable warmth inside, allowing baked goods to rise. The most important thing to pay attention to in this method is to keep the amount of coals underneath slightly less than those on top to prevent the bottom from charring.
What Are the Most Common Mistakes Made in the Meat Sealing Process?
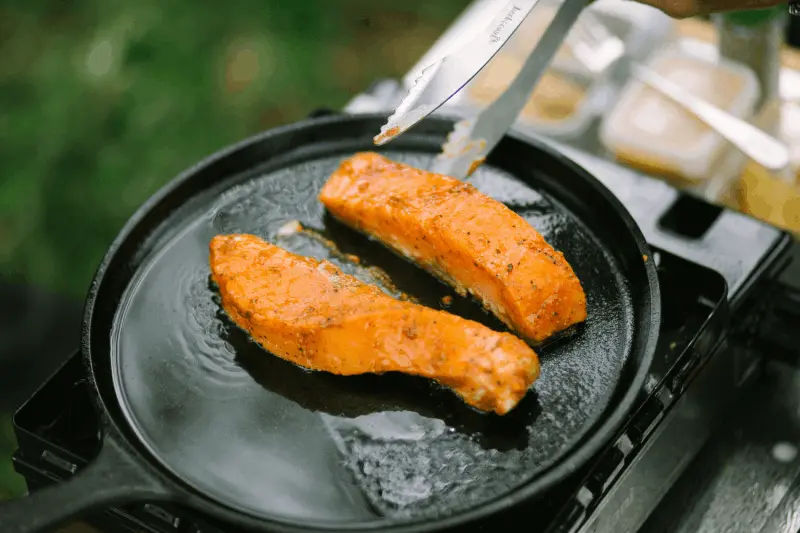
For a perfect steak or chop, sealing in a cast iron pan (Maillard reaction) is essential, but this process is prone to errors in a camping environment. The biggest mistake is not having the pan hot enough; if the pan is not smoking when the meat is added, it will result in steaming instead of sealing. The second mistake is pressing down on the meat as soon as it is placed in the pan. If you do not want to lose the juices of the meat, do not touch it. If the error is severe, it exceeds the capacity of the pan. If you put too much cold meat in the pan at once, the heat of the cast iron will suddenly drop, and the meats will start to release their juices. It is necessary to cook in pieces and allow the pan to heat up again after each batch. Finally, do not cut the sealed meat immediately; since the cast iron pan transfers very high heat, a resting period of at least five minutes is essential to balance the juices inside the meat and must be applied on the camp plate.
What Should Be Done to Prevent Vegetables from Darkening and Losing Vitamins?
Cooking vegetables in a cast iron pan requires skill because high heat quickly disrupts the cellular structure of the vegetables. To prevent vegetables from darkening, you should add them to the cast iron pan last. Especially leafy green vegetables can darken within seconds. Cooking vegetables briefly over high heat using the "sautéing" method preserves their colors and keeps them crunchy. The wide surface of the cast iron pan allows the vegetables to cook without piling on top of each other; thus, they will fry instead of steaming. If you have previously cooked meat in your pan, turning the vegetables in the meat fat adds incredible depth of flavor. However, pre-soaking hard vegetables like carrots or potatoes and bringing them to camp or adding a small amount of water/meat juice while cooking in the cast iron pan and covering it to steam them is a professional technique that minimizes vitamin loss.
Is It Possible to Clean Without Water in the Campsite?
Sometimes the place where you are camping may have limited water, or you may not want to deal with water in winter conditions. Fortunately, the cast iron pan is the most suitable equipment for cleaning without water. Immediately after cooking, while the pan is still hot, scrape the surface with a coarse paper towel or a wooden spatula. Then pour some coarse salt into the pan. The salt will absorb the fat and will help to scrub away food residues. After thoroughly spreading the salt in the pan with a cloth, pour it out. As a final step, spread a thin layer of vegetable oil on the surface with a clean cloth. This method sterilizes your pan and prepares it for the next use. The antiseptic property of salt and the high heat of the fire prevent the formation of germs. This "dry cleaning" method is even healthier than washing the cast iron pan with water to preserve its seasoning layer.
What Should Be the Care Before Long-Term Storage?
Putting your cast iron pan directly into the cupboard after returning from camping can lead to a rusty surprise the next time you use it. When you get home, wash your pan thoroughly with hot water (without using detergent or using very little). Then place it on the stove and heat it until all the moisture evaporates. While the pan is still hot, spread a high smoke point oil (a few drops are sufficient) all over it and continue heating until the smoke point is reached. This is the "top-up seasoning" process. Be sure to let the pan cool to room temperature before removing it. If you are going to stack your pans, place a paper towel between them; this prevents scratching and creates an additional layer of protection against rust by absorbing any moisture in the environment. The cast iron pan is a legacy that is passed down from generation to generation as it is cared for with love and attention.
How to Safely Carry a Heavy Pan?
Cast iron pans are heavy, and this weight can disrupt the balance of your camping backpack. When carrying the pan, you should place it in the middle part of your backpack closest to your body; this maintains the center of gravity. If you are camping with a vehicle, place the pan at the bottom or in a stable corner to avoid crushing other delicate equipment (glass cups or lanterns). It is wise to cover the handle with an old sock or a special leather cover to prevent it from damaging the backpack. Additionally, you can save space by filling the inside of the pan with small camping supplies (spice containers, cleaning cloths). However, remember that these items should be wrapped in a cloth to avoid scratching the inside surface of the pan. Remember, the cast iron pan may be heavy, but the flavor and reliability it offers are worth every gram.
What is the Effect of Wood Type on Food Flavor?
The fuel you use while cooking in a cast iron pan determines the final notes of the dish. Coniferous trees like pine burn very quickly, produce a lot of smoke, and can give the food a resinous, sometimes unpleasant taste. The best woods for cooking are hardwoods like oak, beech, hickory, or fruit trees (apple, cherry). These woods create coals that last longer and provide more stable heat. Especially hickory coals provide a rich and clean heat when placed under the cast iron pan. The smoke from fruit trees adds a slightly sweet aroma to the meats. If you leave the lid of your pan slightly open, this smoke aroma will infuse into the food. The campfire is not only a source of heat but also the most important spice for your meal; therefore, you should pay attention to what you burn as much as what you cook.
What Are the Differences Between a Dutch Oven and a Skillet?
In camp cooking, the cast iron skillet and the Dutch oven serve different roles. The skillet is designed for quick cooking at higher temperatures, searing, and breakfasts; its sides are low, allowing moisture to evaporate quickly and creating crispy textures. The Dutch oven, on the other hand, works like a pressure cooker or oven due to its deep structure and heavy lid; it is ideal for stews, soups, and breads. If you are only going to carry one piece of cast iron equipment, choosing a model that is deeper and can also fit the lid of the skillet increases its versatility. In some camp sets, the lid of the Dutch oven can be used as a skillet when turned upside down; these "combi-cooker" models are worth their weight in gold for campers. Depending on the menu you will be cooking, you will decide which one to take with you. Choosing it not only lightens your load but also optimizes your kitchen efficiency.
Can the Oil Seasoning Process Be Renewed in the Field?
If you notice that your pan has started to build up or its surface has dried out during the camping, you can refresh the seasoning process over the campfire. First, heat the pan thoroughly over the fire and remove any residues. Then, apply the oil you have spread on a clean cloth to the inner surface of the pan like a thin film. Hold the pan over the coals until it starts to smoke and repeat this process a few times. This quick maintenance done in the field will repair the protective layer of the pan and ensure that your next meal is more successful. What you need to be careful about is not to use too much oil; excess oil will create a layer instead of polymerizing. A little oil, high heat, and patience will be enough to bring your cast iron pan back to its original performance on the first day, even in the field.
Why Is Using Heat-Resistant Gloves and a Long Handled Tool Life-Saving?
Cast iron pans not only retain heat at the bottom but also accumulate it intensely at the handle part. The handle of a cast iron pan can reach the same temperature as its body, which can lead to serious burns. When working over a campfire, you should definitely use high-heat resistant leather welding gloves or specially made silicone/leather handle covers for cast iron pans. Additionally, using a long-handled professional tool (poker) to change the position of the pan or adjust the coals protects your hands from direct radiant heat. Having an accident in the camping environment can end your vacation. Therefore, don't fall for the misconception of "I'll hold it with a towel"; a wet towel can transmit heat in seconds, causing steam burns. Safety equipment should be an integral part of your backpack when using a cast iron pan.
What Are the Priorities for Preparing Breakfast in a Cast Iron Pan?
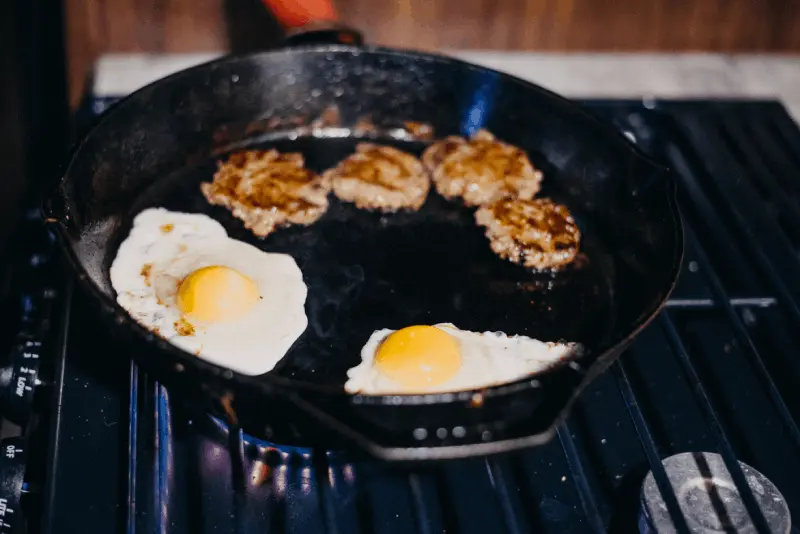
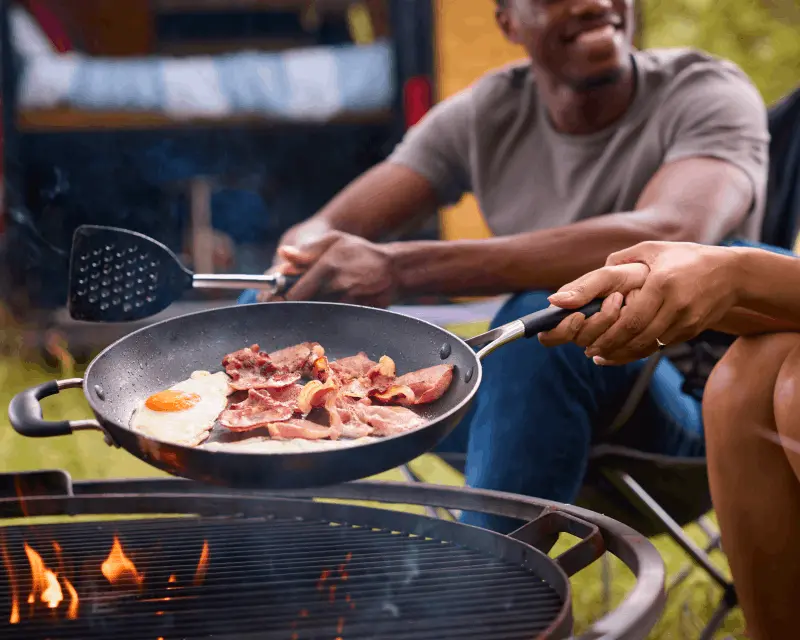
The cast iron pan breakfast, which is indispensable for camping mornings, turns into a feast with the right order. First, you should cook fatty meats like pastrami or sausage to create a natural flavor base and oil layer in the pan. Frying potatoes in the aromatic oil left by these meats will double the flavor you get. You should add the eggs last, when you have slightly reduced the heat; the residual heat of the cast iron will be sufficient to cook the eggs perfectly without burning them. If you are going to make pancakes or crepes in the pan, make sure the surface of the pan is smooth and don't forget to lightly oil the surface in each batch. Since the cast iron pan retains heat, serving the meal with the pan itself will keep the food warm for a long time even in the cool morning air of the camp.
How Can the Effect of Wind on Cooking Time Be Reduced?
Wind in open air is the biggest enemy of the campfire because it constantly blows heat away from under the pan and uncontrollably increases the burning rate. On a windy day, when cooking in a cast iron pan, building a wall of natural stones around the fire or using a collapsible aluminum windscreen can increase heat efficiency by 50%. Wind also cools the upper surface of the pan, extending the cooking time; therefore, always try to use a lid. If you can't find a lid, covering the top of the pan with a piece of aluminum foil will serve the same purpose. Trapping the heat inside activates the oven-like feature of the cast iron, neutralizing the negative effects of the wind. Maintaining a steady heat is the first rule for achieving delicious results in a cast iron pan, and blocking the wind is the biggest step in that direction.
Is It Harmful to Leave Food in the Pan After Cooking?
Leaving food in the cast iron pan after saying "I'll clean it later" is not a good idea for both your pan and your health. The moisture and acids in the cooked food start to penetrate the seasoning layer as the pan cools down. This can lead to rusting of the pan and cause an unpleasant, metallic taste in the food. Especially with the drop in temperature at night in the campsite, the condensation (dew) that forms combines with the leftover food in the pan, accelerating rust formation. You should transfer the food to plates or storage containers as soon as cooking is finished, and you should clean the pan while it is still warm. Cleaning a hot pan is ten times easier than cleaning a cold one. A disciplined cleaning routine is the most important habit that extends the life of your cast iron pan.
Does a "Flavor Memory" Really Exist in Cast Iron Pans?
The "flavor memory" frequently discussed among cast iron pan users is actually based on scientific principles. The polymerized oil layer on the surface of the pan traps aromatic fatty acids from previous cookings at a microscopic level. This does not mean that the pan is dirty; rather, it means that the pan has "matured." With each seasoning process, these aromas add very subtle notes to new meals, creating depth. Especially when combined with wood smoke over a campfire, this process explains why a meal cooked in a cast iron pan is not the same as one cooked in a Teflon pan at home. To preserve this flavor accumulation, you should avoid harsh chemicals and always nourish your pan with natural oils. The older your cast iron pan is and the more camping it has seen, the richer the flavor profile it offers.
Why Should You Avoid Different Types of Metals?
Thin aluminum or cheap stainless steel pans may look attractive in camp cooking because they are lightweight. However, in high and uneven heat sources like a campfire, these metals quickly create "hot spots" and cause food to burn. Aluminum has very high thermal conductivity but low heat capacity; meaning it cools down the moment you take it off the fire. Cast iron, on the other hand, is the opposite; it is heavy, absorbs heat slowly but never releases it. Additionally, at high temperatures, thin metals can warp, whereas a quality cast iron pan retains its shape up to a thousand degrees. Cooking outdoors should be a pleasure, not a survival struggle with burnt food. Therefore, despite its weight, choosing a cast iron pan is a strategic decision that elevates the quality of your camp kitchen to the highest level.
What is the Secret to Making Pizza on a Campfire with a Cast Iron Pan?
Making pizza in a cast iron pan is one of the most impressive things you can do at a campsite. The secret lies in treating the pan like a "stone oven" (pizza stone). First, heat your pan very well over the coals. Before spreading the dough in the pan, sprinkle plenty of cornmeal on the bottom; this prevents sticking and ensures the bottom gets extra crispy. After adding the toppings, cover the pan with a lid and place plenty of glowing coals on top of the lid. While the bottom of the pizza cooks with the heat from the cast iron, the cheese on top will melt and brown from the radiant heat of the coals you placed on the lid. In about 10-12 minutes, you'll have a delicious, wood-fired pizza that is better than the best pizzeria outside. This technique is the most concrete evidence of why cast iron is referred to as a "portable oven."
Is it Possible to Make Desserts Outdoors with a Cast Iron Pan?
Most people think of cast iron pans only for savory dishes, but they are also a fantastic tool for desserts. Especially unforgettable are the "paz paz" (skillet cookie) or fruity "cobblers" made in a cast iron pan over a campfire. After caramelizing apple or peach slices in the pan with butter and brown sugar, you can add ready-made biscuit dough or crumbled oat mixture on top and cover it to bake. The even heat provided by the cast iron ensures that the sugar caramelizes slowly without burning. When making desserts, make sure the pan doesn’t carry any lingering garlic or onion smell from previous meals; boiling the pan lightly with water before making desserts is a good idea. The caramelized fruits combined with the smoky aroma of the wood fire will be the greatest reward that crowns your camping night.
Are Double Handle Models or Single Long Handle Models More Practical?
When it comes to camping use, the physical design of the pan directly affects ergonomics. Long-handled pans allow you to intervene without getting too close to the fire and have higher maneuverability. However, the long handle can create a risk of tipping over on an unsteady surface due to shifting the weight center of the pan outward. Double handle (short handle) models are more stable, sit more securely on the camp stove or over the coals, and take up less space in your bag. However, these models expose your hands to heat more. The ideal solution is to choose a long-handled model and use a support to balance the weight of the handle or opt for "helper handle" models that offer the advantages of both designs. Making a choice based on your cooking style and carrying capacity determines your comfort in the field.
How to Perform Deep Cleaning After Camping?
A cast iron pan that has endured the tough conditions of camping deserves a little "spa" day at home. When you bring the pan home, use hot water and a stiff brush to clean off the residual heat and burnt oils from the campfire. If there are any rough spots on the surface, you can lightly go over them with fine sandpaper or steel wool. Then, dry the pan completely and season it with a thin layer of quality oil (preferably flaxseed oil). Bake the pan upside down in the oven at 230-250 degrees for an hour. This process rebuilds the protective layer worn away during camping and deeply seals the pores of the pan. Turn off the oven and allow the pan to cool slowly inside. This deep cleaning ensures that your cast iron pan stays fresh and rust-free until your next adventure.
How to Choose Equipment That Will Be Passed Down to Future Generations?
A quality cast iron pan can last over a hundred years if well cared for. When purchasing a cast iron pan, you should look at the quality of the cast iron and the surface finish rather than the brand. Older "vintage" pans have thinner and smoother surfaces, making them lighter and less prone to warping. Modern cast iron pans are generally heavier and more textured; however, textured surfaces can also fill with oil over time, becoming smoother. Ensure that the bottom of the pan is completely flat and does not contain any cracks or casting defects. The handles should be securely attached to the body (preferably made of a single piece of cast iron) for safety. Buying a good cast iron pan is not just about acquiring a kitchen tool; it is about obtaining a piece of living history that carries a camping story in every line, which you will pass down to your children and grandchildren.
Why is Patience and Observation Essential in the Art of Cooking with Cast Iron?
Cooking with a cast iron pan over a campfire is essentially a form of meditation. In an environment without digital thermometers and timers, you learn to use your senses. The tone of the sizzle when the meat hits the pan tells you the heat; the change in the aroma of the food signals the beginning of caramelization; the color of the smoke whispers the state of the fire. Cast iron does not like to be rushed. It takes time to heat up, time to cool down, and patience to cook the food. However, this slowness allows the spirit of the camp to infuse into the food. This primal connection established with fire, iron, and food is the very peace we seek when we escape the chaos of modern life and retreat into nature. So stand by your pan, watch the fire, and witness the miracle of cast iron.