What is the Critical Role of Light in Nature Photography Storytelling?
In nature photography, light is not just a physical phenomenon that makes objects visible; it is also the fundamental element that defines the spirit, atmosphere, and story of the photograph. The quality of light directly affects the emotion that a landscape evokes in the viewer. For example, a valley illuminated by the first light of morning gives a sense of hope and renewal, while a gloomy light before a storm creates unease and drama. Learning to read light as a photographer essentially means deciphering the language of nature. The angle of light, color warmth, and harshness can either highlight the texture of objects in your frame or turn them into mere silhouettes. Therefore, beyond technical skills, understanding the "mood" of light at that moment is the first and most important step in transforming an ordinary shot into a timeless work of art.
How Does the Golden Hour's Spectral Distribution Add a Dimension to Landscape Photographs?
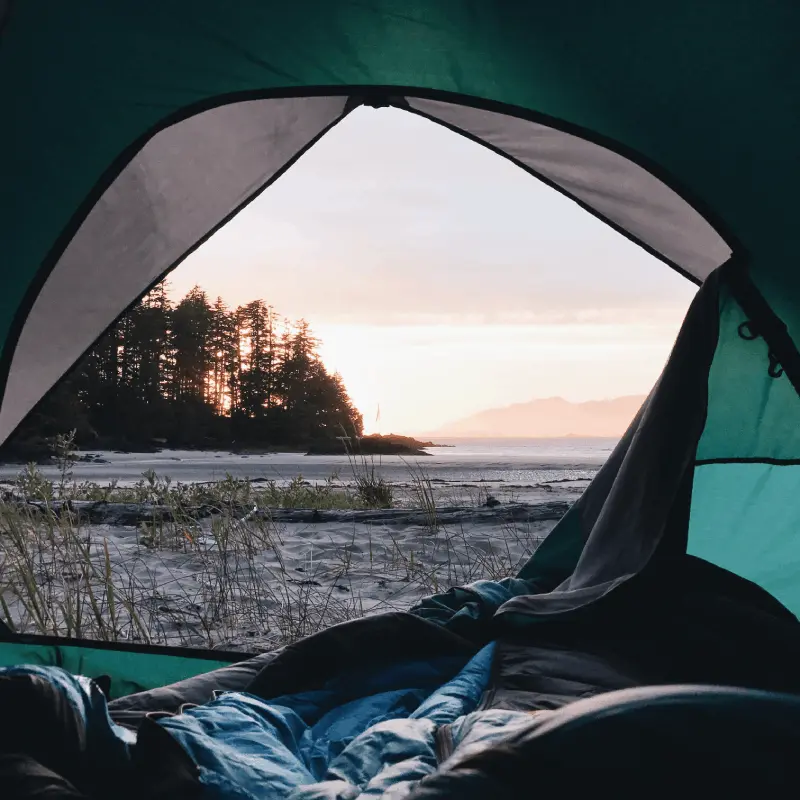
The "Golden Hour," which occurs just after sunrise and just before sunset, is the time when sunlight passes through the thickest layer of the atmosphere to reach the earth. During this process, blue light wavelengths are scattered, leaving warm yellow, orange, and red tones. This spectral change gives landscape photographs a natural warmth and captivating brightness. The low angle of light accentuates the terrain, creating long and soft shadows. These shadows enhance the three-dimensional perception of the photograph and allow textures (such as a rocky surface or sand dunes) to emerge in all their details. Photos taken during the golden hour not only present a visual feast but also deeply convey the tranquility of the moment and the elegance of nature to the viewer.
How to Set Up Tripod and ISO Balance to Capture the Sapphire Tones of the Blue Hour Without Loss?
The "Blue Hour" begins after the sun dips below the horizon, enveloping the sky in deep blue and sapphire tones, creating a mystical atmosphere for a brief period. During these hours, the rapid decrease in ambient light levels makes technical precision critically important. Handheld shooting will inevitably lead to blurriness due to low shutter speeds; therefore, using a sturdy tripod is essential at this stage. Keeping the ISO value at the lowest possible level (usually ISO 100) helps prevent digital noise that may occur during long exposures. When low ISO and long exposure times are combined, water surfaces become smooth, and the deep blue tones of the sky are captured in their purest form by the digital sensor. This balance is the key to transferring the peaceful and sharp texture of the blue hour into the photograph.
How to Plan Timing to Capture the Alpenglow Phenomenon on Mountain Peaks?
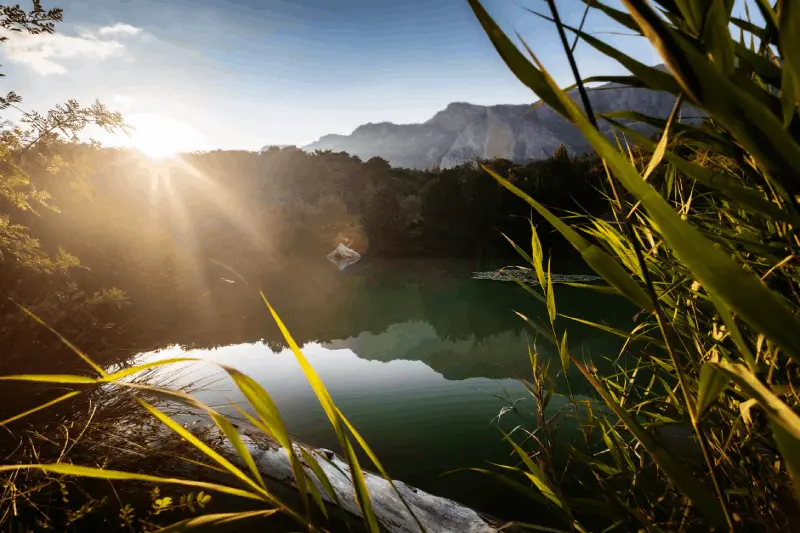
Alpenglow is the phenomenon where sunlight reflects off the upper layers of the atmosphere while the sun is below the horizon, painting mountain peaks in pink, purple, or bright red tones. This natural event typically occurs just before (sunrise) or just after (sunset) the golden hour and lasts only a few minutes. Capturing alpenglow requires meticulous preparation and timing. The photographer must be ready at the shooting location at least 30 minutes before the sunrise or sunset. The western slopes of the mountains catch this light before sunrise, while the eastern slopes capture it after sunset. Monitoring the weather to avoid missing this brief color explosion and predicting the angle at which the light will hit the peaks is vital for an epic mountain photograph.
How Does Atmospheric Perspective and Light Distribution Affect Composition in Foggy Weather?
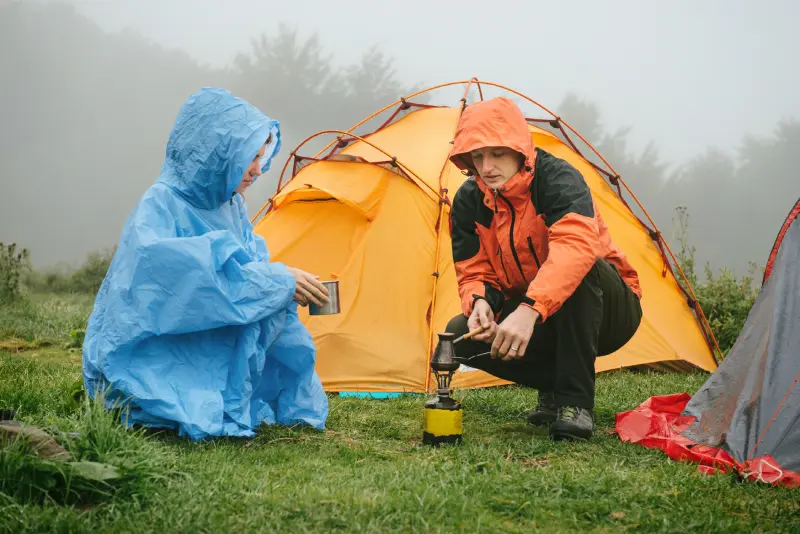
Fog creates low-contrast and soft lighting by scattering light in every direction, making it the most effective way to create a sense of depth known as "atmospheric perspective" in nature photography. Nearby objects appear darker and more defined, while distant objects gradually fade away into the fog. This layering adds tremendous depth and mystery to the photograph. The absorption and scattering of light by fog completely eliminate harsh shadows and reduce color saturation, offering a more pastel palette. When shooting in a foggy forest or by a lake, keeping the composition simple and highlighting the whimsical texture created by the fog allows you to create a tranquil story that draws the viewer into the photograph.
How to Achieve Correct Exposure Against the High Reflectance Ratio (Albedo) of Snow?
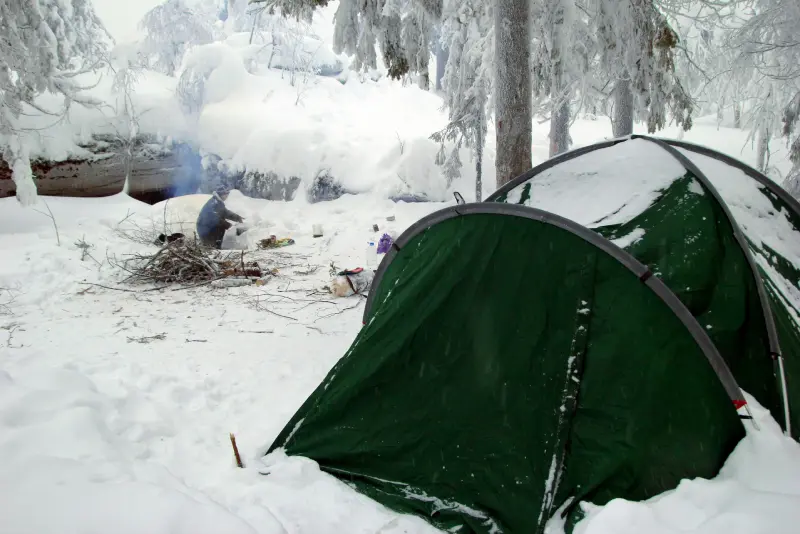
Snow reflects nearly 90% of the light that falls on it (high albedo effect), which can mislead the light meters (exposure meters) of cameras. The camera perceives this extreme brightness as "gray" and captures the photograph darker than normal, resulting in a grayish snow image. To preserve the crystal whiteness and brightness of the snow, it is usually necessary to apply exposure compensation between +1 and +2 stops. By checking the histogram, ensure that the "distribution" leans towards the right side (bright areas) but does not clip. Additionally, the low angle of sunlight during winter causes the smallest crystals on the snow to sparkle; preferring slightly angled light is ideal for capturing the captivating texture of the winter landscape.
How to Highlight Light Rays (God Rays) in the Forest?
What Weather Conditions Should Be Expected?
The light beams filtered through the branches of trees, known as "God Rays", are among the most aesthetic images in nature photography. For this phenomenon to occur, there must be particles in the atmosphere that scatter the light. The slight mist created by the humidity in the early hours of the morning, the dew on the grass or the moisture on the forest floor provides an excellent ground for these beams. Especially in moments when the sun suddenly breaks through after rain, the water particles in the air turn into visible light beams. Shooting with a slight backlight in the direction the light is coming from makes the beams more pronounced. A background consisting of dark tree trunks or shaded areas increases the contrast between the light beams and the surroundings, elevating the dramatic effect of the image to the highest level.
What Are the Advantages of Using a Cloudy Sky as a Natural Softbox in Macro Photography?
While landscape photographers often dislike cloudy and overcast weather, for macro photographers, it is an invaluable blessing. The cloud layer acts as a massive softener (softbox) that filters the harsh and direct sunlight, diffusing it evenly in all directions. This way, harsh reflections on the petals of flowers and the glaring lights on the shells of insects disappear. Soft light reveals all the micro details, textures, and true color saturation of the subject. Additionally, the absence of harsh shadows ensures that the form of the object appears more balanced. Focusing solely on the subject and its details without including the sky in cloudy weather provides macro photographers with an unparalleled technical comfort zone to document the purest form of colors and shapes.
How Do Dramatic Light Beams Before and After a Storm Enhance Emotional Depth?
Moments of chaotic weather during a storm present the most savage and impressive light of nature. A single beam of sunlight filtered through dark, leaden clouds illuminates a specific part of the landscape like a spotlight, evoking themes of "hope" or "divinity". This high-contrast situation draws the viewer's attention directly to the illuminated area. The increased visibility and saturated colors after the storm clear the air, adding clarity to the photograph. The dramatic cloud formations in the sky, combined with the calmness on the ground, enhance the emotional weight and visual dynamism of the photograph. Since these moments change very quickly, the photographer must be agile and continuously control the exposure to freeze these fleeting light plays.
How Can Texture Be Emphasized Using Backlighting in Plant and Leaf Photography?
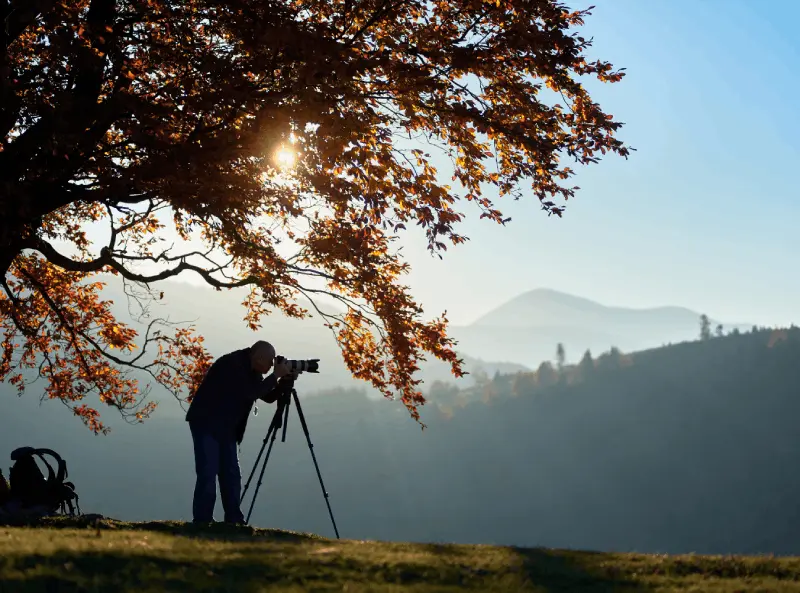
Backlighting, where the light source is positioned behind the subject, creates wonders, especially in plant and leaf photography. As the light passes through the leaf, it illuminates the vein structure, cellular texture, and inner color vibrancy almost like an X-ray film. The "backlighting" technique creates a thin, bright outline (rim light) around the edges of the subject, separating it from the background and adding depth. A forest floor or a flower garden captured with this method achieves a fairy-tale and luminous appearance. To prevent glare, using a lens hood and adjusting the exposure not according to the brightest area of the leaf but to the mid-tones where you want the texture to be visible ensures you get the highest yield from this technique.
Is It Possible to Turn the Harsh Shadows of the Sun into a Graphic Design Element?
Traditionally, it is advised to avoid the hours around noon in nature photography, but this harsh light is actually a powerful graphic tool for a creative photographer. The dark and sharp shadows created when the sun is directly overhead create strong geometric forms and harsh contrasts within the landscape. Especially in black-and-white photography, these shadows can become the main elements that determine the rhythm and balance of the composition. The harsh shadows on sand dunes or the vertical traces of tree trunks falling to the ground help create an abstract and minimalist language. This "light-shadow battle" created by harsh light allows you to document not only the beauty of nature but also its harsh and graphic character.
What Is the Relationship Between Light Pollution and Astronomical Twilight in Night Photography?
In night photography, simply waiting for the sun to set is not enough to capture the Milky Way or constellations clearly; "astronomical twilight" must end. This phase occurs when the sun is 18 degrees below the horizon and there is no residual sunlight in the sky. However, in the modern world, light pollution is the biggest factor threatening this natural darkness. The glare from city lights reflects into the atmosphere, diminishing the contrast of the stars and covering the sky with a yellow-orange veil. Therefore, for a successful night shot, both astronomical timing must be considered, and dark sky areas (Dark Sky Parks) away from light pollution should be preferred. When the right time and location come together, those faint lights in the depths of the universe will come to life in all their glory on your sensor.
How Should a Polarizing Filter Be Used to Control Light Reflections on Water Edges?
Water is one of the most powerful surfaces reflecting light in nature photography, and this can sometimes lead to unwanted glare. A circular polarizing filter (CPL) is a tool that physically blocks or enhances these reflections on the water surface. By rotating the filter, you can completely eliminate the reflection on the water and reveal the stones in the riverbed and the color of the water, or you can enhance the reflection to create a perfect mirror effect. The polarizing filter provides the highest efficiency especially when the sun is at a 45-degree angle. It also deepens the blue of the sky and enhances the contrast of the clouds. This filter, which is often overlooked, is the most valuable technical assistant in a photographer's bag when it comes to controlling light.
How Do Neutral Density (ND) Filters Manipulate the Flow of Light in Long Exposures?
Neutral Density (ND) filters are dark-colored glasses that reduce the amount of light entering the camera without altering the colors. These filters allow you to make long exposures in bright daylight, enabling you to capture the "flow of light over time." When you use an ND filter to extend the exposure time to seconds, each drop of flowing water merges to create a silky, fabric-like texture. Similarly, clouds moving in the wind create soft strokes in the sky. By artificially reducing the light, slowing down the shutter speed gives the photographer the freedom to visualize the effect of time on nature and adds dynamism to a static frame.
How is the Dynamic Range of Digital Sensors Protected in the Harshest Moments of Light?
The dynamic range refers to how well a camera sensor can capture details in the darkest shadows and the brightest highlights at the same time. In landscape shots where the light is very harsh and the contrast is high (for example, a bright sky and a dark valley), the sensor's dynamic range may fall short. To overcome this situation, the "Bracketing" technique is used; that is, the same scene is shot with different exposure values (one dark, one normal, one bright) and then combined digitally. Additionally, shooting in RAW format preserves the sensor data in its rawest form to recover details from shadows and highlights. This way, even in the most aggressive moments of light, no detail loss occurs in any part of the photograph.
Does the Low Angle of the Sun Create a "Long Golden Hour" Effect Throughout the Day in Winter?
Due to the tilt of the Earth in winter, the sun never rises as high in the sky as it does in the summer months; it always progresses on a lower path. This astronomical situation causes the "long golden hour" effect to occur in a significant portion of sunny winter days. The light comes in at a lateral angle throughout the day, which means shadows are always long and textures remain distinct. The harsh light we avoid during the summer's golden hours exhibits a much softer and more aesthetic character in winter. This low-angle winter light creates a crystal clarity and unique illumination over snow-covered trees and frozen lakes, providing a suitable environment for photography at any hour of the day.
What is the Effect of Moonlight as a Natural Night Lamp in Landscape Photography?
Moonlight is essentially the reflection of sunlight off the moon's surface, but it has a much lower intensity and a cooler color warmth. In night landscape photography, the phases of the moon completely change the character of the shot. A full moon illuminates the earth like a giant night lamp, revealing the details of mountains, rivers, and forests; it even allows you to create surreal images that look like they were taken in daylight but with stars in the sky during long exposures. On the other hand, during the new moon phase, the absence of moonlight allows the Milky Way to shine in all its glory. By tracking the moon's rise and set times, incorporating the glow it adds to the landscape into the composition becomes a critical technique that adds a whole new dimension to night photography.
How to Capture the Graphic Forms Created by Side Lighting in Desert Dunes?
Deserts are the most sensitive geographical areas to the direction of light. To photograph the famous sharp ridges and flowing forms of sand dunes, hours when the sun is at the side (side lighting) should be chosen. When light comes directly from the front, sand mounds appear flat and dimensionless, while side light illuminates one side of the dune and leaves the other side in deep shadow. This light-shadow distinction highlights the magnificent patterns and ripples shaped by the wind on the sand. The black areas created by shadows serve as powerful graphic lines in the composition, drawing the eye into the frame. In such shots, sunrise and sunset also maximize the visual effect by painting the sand with a reddish hue.
What is the Effect of Reflected Light on Color in Deep Canyons?
In deep and narrow canyons (like Antelope Canyon), direct sunlight rarely reaches the bottom of the canyon. However, the harsh light hitting the canyon walls softens as it reflects off the opposite wall and becomes "reflected light." This reflected light illuminates the red, orange, and purple rock layers in the canyon as if they are glowing from within (glow effect). This type of light does not completely eliminate shadows but illuminates them very softly, making the texture of the rocks appear velvety. When measuring light in such enclosed spaces, averaging the brightest and darkest points is a critical technique to accurately capture the stunning color transitions of the canyon.
How Does White Balance Adjustment Change the Emotional Tone in Different Lighting Conditions?
White balance is one of the most important settings that determines the overall color warmth of a photograph and thus controls the emotion conveyed to the viewer. This setting, expressed in Kelvin values, can make the scene appear more "warm" (yellow/orange) or more "cool" (blue). For example, shooting a winter morning in "cloudy" mode can create a false warmth by cutting blue tones into the scene; whereas leaving it in "daylight" mode preserves the cold and sharp spirit of winter. Although photographers shooting in RAW format have the flexibility to change this setting later, capturing the correct tone at the moment of shooting is crucial. The composition decisions are influenced by the view. Playing with the color of the light helps convey not only the reality of a landscape but also what you feel at that moment.
How to Prevent the Explosion of Light or the Darkening of Shadows in Histogram Reading Skills?
A histogram is a graphical map that shows the distribution of light values in a photograph. The left side represents pure blacks, while the right side represents pure whites. Instead of relying on the image on the LCD screen after taking a shot, looking at the histogram is essential for technical perfection. If the graph is climbing up against the right edge, it means that details have been lost in the bright areas (exploded); if it is leaning against the left edge, the shadows are completely dark. In an ideal nature photograph (when contrast is not intentionally chosen to be very high), the graph should spread in the middle area without hitting either edge. Knowing how to read a histogram ensures that you can produce technically "correctly" exposed files even in the most complex scenes of light.
Is It Correct to Include Lens Flare Effect as an Artistic Choice in Composition?
Lens flare is an optical phenomenon that occurs when a light source (usually the sun) enters the lens directly. Although it was seen as a technical flaw in the past, it is now used as an artistic choice in nature photography to add "naturalness", "warmth", and "summer spirit" to the story. The "star effect" (sunstar) created by partially hiding the sun behind the edge of a tree or mountain adds a focal point to the frame. However, care should be taken not to cover the main subject's face or important details when using this effect. Using flare in moderation enhances the viewer's feeling of "being there" and adds organic depth to the photograph.
What is the Most Suitable Light Angle to Burst Fresh Green Tones in Spring?
The angle of light plays a decisive role in the color saturation when photographing the awakening of spring and those fresh and vibrant greens. Direct harsh sunlight can make greens appear grayer and lifeless due to reflections on leaf surfaces. Instead, using "backlighting" can ensure that the chlorophyll inside the leaves shines, revealing that legendary bright green. Additionally, the soft light during moments when the sun comes out after rain maximizes the saturation of wet leaves. Using a polarizing filter to eliminate reflections on leaf surfaces is also a fundamental method to make spring colors deeper and more realistic.
How is the Silky Texture Given to Water in Low Light Conditions in Waterfall and Stream Shots?
Transforming water movement into a silky texture is entirely related to the length of the exposure time, and this technique is easiest to apply in low light conditions. During times when light is minimal, such as before sunrise or after sunset, long exposures between 1/2 second and 5 seconds can be made without needing an ND filter. During this time, each movement of the water builds up on the sensor, creating that misty and fluid appearance. Low light also reduces reflections on the wet rocks around the water and reflects the green of the moss more naturally. This "silky water" effect is one of the most popular ways to add dynamic life and tranquility to a still landscape photograph.
How is the Light Painting Technique Applied When Shooting at Night in Nature?
Light painting is a technique of manually illuminating specific objects in the frame (a tree, an old cabin, or a group of rocks) with an external light source (flashlight or LED panel) while the long exposure continues. With this method, you can add texture and depth to your foreground subjects that remain completely in darkness. The key point is to continuously move the light source over the subject like a brush stroke instead of keeping it fixed; this way, the illumination appears natural and homogeneous. Adjusting the intensity and duration of the light through experimentation ensures a perfect balance between the stars in the night sky and your subject on the ground. This technique is a great opportunity to add creativity and a personal signature to nature photography.
What Are the Invisible Effects of Atmospheric Refraction and Weather Conditions on the Sharpness of Light?
In photography, light is not just a source of illumination but an energy filtered through the atmosphere. Humidity, dust, smoke, and even temperature differences in the air affect the journey of light. For example, when you look at distant mountains on hot summer days, the "heat haze" distorts the sharpness of the image and blurs the details. In contrast, in the cold and dry air of winter, the atmosphere is cleaner, increasing the visibility distance and allowing light to reach the ground much sharper. The "crystal clarity" created by the settling of dust in the atmosphere after rain is a natural cleaning process that enhances the quality of light. Knowing these atmospheric variables helps you understand which type of landscape is more suitable for which day.
What is the Power of Shadows in High Contrast Scenes that Contributes to Landscape Dynamics?
Just as light is important in a photograph, the absence of that light, which is shadow, is equally valuable. Shadows outline the boundaries of forms, give volume to objects, and create negative space in the composition, providing balance. In high contrast scenes (such as canyon interiors or dense forests), the areas occupied by shadows create mysterious zones that trigger the viewer's imagination. The black lines created by shadows can be used as "guiding lines" that direct the eye to the main subject. Observing where the shadows fall and how they create a pattern while focusing on the light is one of the exercises that most enhances a photographer's visual design ability.
What is the Importance of Patience and Proper Location Scouting While Chasing the Light?
A perfect nature photograph is not taken by chance; it is usually the result of long-term planning and patience. Location scouting helps determine the angle at which the sun will hit that area and what shadows will be present at what time. It ensures that you understand what you are creating in advance. Although mobile applications (like PhotoPills) provide technological support in this regard, seeing the terrain in person and experiencing the character of the light is something entirely different. Sometimes, you may need to go to the same spot for days, or even seasons, to capture that "perfect light." When the right moment arrives (for example, when the clouds have completely cleared or the fog has fully lifted), being ready there represents the disciplined aspect of nature photography that requires physical and mental preparation.
What is the Flexibility of Digital Editing (Post-Processing) of Light Taken in RAW Format?
A RAW file is a digital negative that stores the light data hitting the sensor in its raw form without any processing. In JPEG captures, the camera interprets the light and discards some details, while in RAW format, the finest nuances of the light are preserved. This provides tremendous flexibility, especially when correcting exposure errors or pulling details from shadows in high dynamic range scenes (shadow recovery). In a digital darkroom, you can optimize the color, contrast, and brightness of the light without compromising quality. This process is an indispensable part of modern photography to fully reveal the potential of the light you have captured and blend it with your artistic vision.
What Does Learning to See Light Symbolize in a Photographer's Technical Development?
Learning to see light is more of a mental transformation than a technical skill. A photographer matures when they begin to look at objects not just through "what happened" (a tree, a rock, a river) but through "how the light reflects." At this stage, the equipment becomes a simple tool used to freeze the story of the light at that moment. Seeing light is the ability to transform the ordinary into the epic, emptiness into fullness, and a moment into eternity. This journey never ends; because in nature, light never repeats itself exactly. Every new sunrise is a new opportunity to discover what the light will whisper to you that day, and this discovery excitement is the purest source of motivation for photography.