Which Kitchen Waste Can Be Used to Build an Efficient Alcohol Stove?
When starting to make a camp stove at home, the first place to look is your recycling bin. Aluminum beverage cans, due to their thin structures and high thermal conductivity, are ideal for alcohol stoves. Especially the standard 330 ml cans are preferred by ultra-light campers because of their lightweight. However, you are not limited to just beverage cans. Tuna fish cans or cat food cans have the ideal depth and durability for what we call "wick stoves." Tomato paste cans can be used for the bodies of micro stoves that operate with wood due to their thicker steel structures. The basic rule to consider in material selection is whether there is a plastic coating or food protective layer on the metal. The transparent protective layer inside aluminum cans may emit a slight odor when first ignited, so it is important to burn your stove empty outdoors the first time for safety reasons.
How Does the Choice of Tin Can Affect Burn Time and Heat Efficiency?
The duration your stove will burn and how quickly it will boil water is directly related to the volume and metal thickness of the can you choose. Thin-walled aluminum cans heat up very quickly (prime time), which allows the stove to produce a jet flame seconds after being lit. However, these cans have a lower heat retention capacity. On the other hand, thicker steel structures like canned food cans distribute heat more stably after heating, but the "prime" preheating time is longer. If you want to maximize burn time, you should prefer tuna cans with a wide fuel chamber. A larger surface area allows the alcohol to vaporize more slowly and controllably. If your goal is just to quickly heat coffee water, narrow and long models made from energy drink cans are more efficient as they focus the flame on a point. Remember that as the mass of the metal increases, the energy the stove uses to heat itself also increases.
How Should Hole Sizes and Numbers Be Calculated for Jet-Stove Design?
The heart of an alcohol stove is the jet holes that open to the upper part. These holes allow the alcohol vapor inside the chamber to escape under pressure and mix with the oxygen outside to burn. For an ideal "jet" effect, the hole sizes should generally be between 1.5 mm and 2 mm. If you make the holes too large, the pressure drops and the flames become feeble; if you make them too small, the pressure can increase excessively, leading to irregular burning or flaring of the stove. The number of holes should also be proportional to the circumference of the can. For a standard soda can, 16 to 24 holes are sufficient to create a homogeneous flame ring. You can use a pin or a thin drill bit to make the holes. It is critical that the holes are perfectly symmetrical to ensure even heat distribution on the bottom of the pot. Additionally, if the holes are not angled upwards but slightly inward or sideways, the flames will wrap around the pot better.
What Household Items Can Be Used Instead of Glass Wool as Insulation Material?
In many DIY stove designs, insulation material is placed in the inner chamber to ensure fuel absorption and reduce the risk of fire in case the stove tips over. While glass wool or ceramic wool is used in industrial models, it is hard to find these at home. Instead, an old carbon felt (piece of welding blanket) is the best alternative. If that is not available, rolled cotton fabrics or makeup pads can provide a temporary solution; however, cotton will eventually burn and turn black over time. Another creative solution is mineral particles found in potting soils like perlite or vermiculite. These materials are non-flammable and absorb alcohol like a sponge. Additionally, steel scrubbers (wire wool) can also be placed in the inner chamber. Wire wool is non-flammable and helps distribute heat more quickly within the fuel, enhancing the stove's performance. However, you should never use any material containing plastic (like sponges, etc.) as they will melt and release toxic gases.
How Should Aerodynamic Principles and Material Selection Be in Windshield Design?
Even the most efficient stove can be helpless against the wind in nature. A good windshield should trap heat while allowing the necessary oxygen for combustion to enter. Layers of aluminum foil from home or baking tray foils are suitable for a lightweight windshield. However, for a more professional result, you can use the aluminum sheet obtained by cutting open a hollow beverage can. When designing a windshield, do not completely enclose the stove; leave "air windows" at the bottom. Aerodynamically, the windshield should be about 1-1.5 cm wider than the pot and should wrap around the sides of the pot to some extent (chimney effect). This way, as hot air rises from the sides of the pot, heat transfer is maximized. If the windshield is too narrow, your stove may overheat and consume fuel faster than necessary.
What Other Household Liquid Fuels Can Be Safely Used in Camp Stoves Besides Alcohol?
The most common fuel in DIY stoves is alcohol or isopropyl alcohol of 90% or higher. However, in emergencies, you can also evaluate other flammable substances at home. Cologne can burn due to its high alcohol content (70-80%), but it can produce soot and reduce heat efficiency due to the essences and water content. Hand sanitizers (in gel form) can burn due to the alcohol they contain and are preferred in "buddy burner" style stoves as the risk of spillage is low. However, gel fuels leave behind a residue. It leaves a residue. Bioethanol (fuel for stoves) is one of the cleanest burning and highest heat producing options. Fuels you should definitely avoid are gasoline and kerosene. The flash points of these substances are very low and using them in homemade tin stoves poses a risk of explosion. Kerosene can only be used in special wick stoves, it does not burn in standard alcohol stoves and produces a very strong odor.
How to Set Up a Double Cider Mechanism for Wood Gas (Gasifier) Stove at Home?
Wood gas stoves are advanced technology systems that burn smoke again. To do this at home, you need two different sized cans that can fit inside each other (for example, a large pea can and a small tuna can). You should make air inlet holes in the bottom of the outer can, and holes in both the bottom and the top edge of the inner can. The secret of the system is this: the air entering from the bottom heats up and rises through the gap between the two cans, exiting through the holes on top of the inner can and mixing with the smoke coming from the wood. This "secondary combustion" ensures the smoke burns and creates a very high heat while minimizing the amount of wood used. When setting up this arrangement, make sure the gap between the two cans is between 5 mm and 1 cm. This distance ensures the air has enough time and space to heat up adequately.
How to Make a Portable and Foldable Grill System from Canned Food?
If boiling water is not enough, you can integrate a simple grill system over your stove. The easiest way to do this is to cut the side walls of a large can into vertical strips and bend these strips outward. However, for a sturdier structure, you can use an old oven rack or metal hangers. If you cut the metal hangers to the appropriate size and bend them into a "U" shape, you can fit them into the slots you created on the edges of the can, creating a sturdy platform that can hold a pot. If you want a foldable system, you can connect four rectangular sheets of metal with hinges or simple wire rings. This system serves as a windbreak and allows for grilling steak or vegetables by placing a wire grill on top. Make sure the material is not galvanized, as galvanized metal releases toxic gases when heated; stainless steel or raw iron is the safest.
What Kitchen Items Can Be Used Instead of Magnesium Rod to Start a Fire?
If you have built your stove but your lighter is broken, don't panic. There are many hidden helpers you can use to start a fire in your kitchen. An old type of steel scrubber (the thin ones) will start to glow immediately when connected to both ends of a 9V battery and can ignite nearby dry twigs or alcohol-soaked cotton. If it's a sunny day, you can fill a transparent plastic bag with water and use it like a magnifying glass to focus sunlight and start a fire. Additionally, you can create sparks by rubbing the back of a steel knife against a quartz stone or flint. Potato chips (especially oily ones) serve as excellent tinder; they burn for a long time due to their high oil content. If you mix cotton from home with petroleum jelly and carry it with you, you can ignite your stove with a single spark even in the toughest weather conditions.
Is It Necessary to Use Copper Pipe Coils to Optimize Heat Distribution?
In some advanced DIY projects, you may see copper pipes wrapped around the stove. This system is called a "coil burner." The fuel passing through the copper pipe turns into gas as the pipe heats up and creates a much stronger flame. Setting up this system at home is not a must, but it provides a significant advantage if you are going to camp at high altitudes. You can use copper pipe to achieve gas stove performance. You can shape copper brake pipes by wrapping them around a cylinder. However, the risk of this design is that excessive pressure can build up inside the pipe. If the pipe gets clogged or the fuel flow is unstable, the system can explode. For beginners, standard "can stove" models are both safer and easier to make. The use of copper pipes is more for engineering experiments and extreme performance pursuits.
How to Establish a Balance Between Lightness and Mechanical Durability with Aluminum?
Aluminum is a favorite among campers due to its lightness, but it shows a tendency to soften under high heat. If you place a heavy cast iron pan on top of a stove you made at home, the stove can be crushed. To solve this durability issue, you can add a "central column" to the inside of your stove. If you take an empty energy drink can and roll it into a narrower tube and place it inside the main body, this vertical piece will act as a column to support the weight. Additionally, when joining aluminum cans, if you slightly crimp the overlapping parts using a method called "crimping," the structural integrity of the stove increases. Another way to enhance durability is to place the stove inside a can (pot stand); thus, while the weight of the pot is supported by the outer steel can, the inner aluminum can only performs the burning function.
How to Create Venturi Effect to Increase Oxygen Flow in the Combustion Chamber?
The Venturi effect is the principle of fluids speeding up as they pass through a narrow throat. By creating this effect in your camping stove, you can achieve a bluer and hotter flame. To do this, you should design the air inlet holes at the bottom of the stove to be wide, while the parts opening to the combustion chamber should be narrower. In wood stoves, instead of placing the pot directly on top of the stove and blocking the airflow, you should use legs that leave a gap of 2-3 cm between the pot and the stove. This gap allows fresh air to be quickly vacuumed in from below while hot gases exit. If your stove is constantly emitting black smoke, this indicates that the stove is not functioning properly. is a sign of oxygen deficiency. To optimize the Venturi channels, giving a slight angle to the inner walls of the stove ensures better mixing of the fuel by creating turbulence in the air. This way, your fuel consumption can increase your thermal efficiency by up to 40%.
How to Design a Minimalist and Ultra-Light Wood Stove with Sheet Metal?
If you want to get rid of the volume of canned food, you can make foldable sheet metal stoves called "flat-pack". The side panel of an old computer case or a stainless steel tray is a great raw material source for this job. Draw a template of four side panels and one bottom panel on a cardboard. Cut notches (like a puzzle) on the edges of these panels to interlock with each other. After cutting these pieces with metal scissors and deburring them, assemble them together. The biggest advantage of this design is that it takes up as much space in your bag as a notebook and can work with any kind of scrap you find in nature. By making triangular or circular holes on the panels, you can reduce the weight and increase the combustion efficiency. These types of stoves are known as "Hobo Stove" and take minimalism to the next level.
Do High-Temperature Resistant Adhesives Pose Health Risks in DIY Projects?
When joining aluminum cans or to prevent leaks, epoxy or heat-resistant adhesives are usually used. However, great care must be taken here. Most standard epoxies begin to degrade above 150 degrees and emit toxic fumes. You should avoid using adhesives at points that will come into direct contact with flames during stove design. Instead, prefer mechanical joining methods (interlocking, riveting). If a sealing material is absolutely necessary, you can use products like "high-temperature silicone" or "exhaust putty" sold in hardware stores that can withstand 300-1000 degrees. Still, the safest approach is to burn the stove several times at high temperatures before cooking to ensure that residues are eliminated. Remember, the purpose of a camping stove is not just to cook food, but to do so in a healthy way.
Can Electricity Be Generated from a Stove Using Thermoelectric Generator (TEG) Modules?
This is the pinnacle of the DIY camping stove hobby. TEG modules (Peltier modules) generate electricity when one surface is hot and the other is cold. By mounting this module on the side of a homemade wood stove, you can generate enough energy to charge your phone from campfire. However, when connecting one side of the module to the stove, you must attach a large cooling block (like a CPU cooler) and a small fan to the other side. The greater the temperature difference, the more electricity is produced. It is possible to set up this system with parts you salvage from old electronics at home, but you must be very careful with thermal paste usage and insulation. With this system, you not only cook food but also provide the energy needed for nighttime lighting.
What Methods Should Be Followed to Clean the Stove and Prevent Soot Formation?
Especially in wood and alcohol stoves, carbon deposits (soot) accumulate over time on the bottom of the pots and inside the stove. This reduces thermal efficiency and causes everything in your bag to get dirty. To reduce soot formation, adding a small amount of water (5-10% for alcohol stoves) to the fuel prevents the flame from producing soot, but it slightly extends the boiling time. In wood stoves, using only very dry and peeled branches minimizes soot. During the cleaning phase, a mixture of baking soda and vinegar at home is very effective in removing burn marks on metal. If your stove is aluminum, you can ensure the metal shines by using a soft sponge and toothpaste instead of scrubbing with hard wires. Wiping your stove with a damp cloth after each use prevents accumulated ash from drawing moisture and causing the metal to corrode.
Why is a Pre-heater Necessary in Extremely Cold Weather Conditions?
When the air temperature drops below zero, alcohol stoves struggle to vaporize the fuel. Even if you strike a match, the fuel may not ignite. To solve this problem, you should add a small container or chamber under your stove. By igniting a few drops of alcohol that you will drip into this chamber, you will heat the body of the main stove. The heated body will start to vaporize the fuel inside, and the jet holes will come into play. To make this setup at home, it is sufficient to attach or secure a wide jar lid under the stove. In winter camps, you should not place your stove directly on the ground; you must place a piece of wood or foam insulation underneath to prevent heat from escaping into the ground. The pre-heating process not only keeps the stove running but also ensures more stable combustion of the fuel, increasing efficiency.
What Stable Alternatives Are There Besides Steel Wire Hangers for Pot Supports?
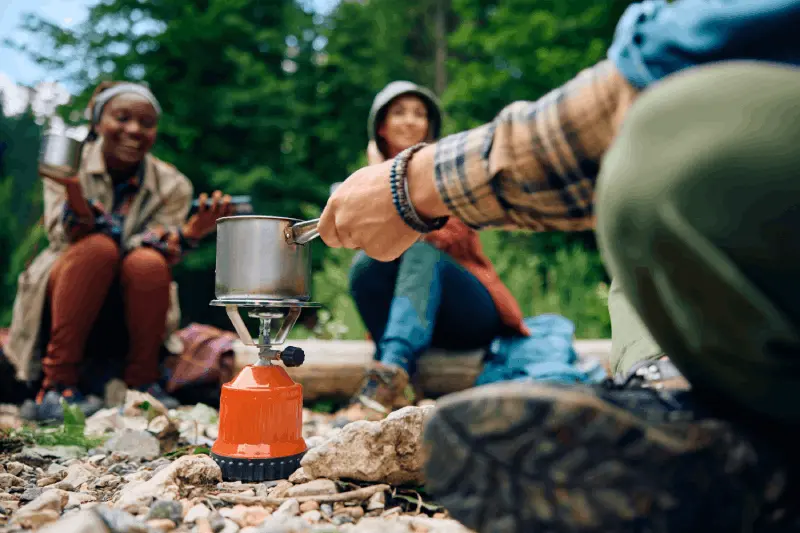
Steel wire hangers are cheap but can lose their shape at high temperatures, causing the pot to tip over. If you are looking for a safer alternative, you can use large steel hooks or bicycle rim spokes. Since rim spokes are made of high-carbon steel, they are very durable against heat. Another creative solution is to mount three long bolts and nuts circularly on the stove body. By adjusting the heights of the bolts, you can ensure that the pot stays perfectly balanced. If you want something ultra-light, you can create your own pot stand by combining "titanium foil" strips. However, the simplest and most robust solution at home is to place three equally high stones or bricks around the stove. These are the metal parts cut from the "L" shaped serving box.
Is it Possible to Analyze Heat by Changing the Flame Color in an Alcohol Stove?
The color of the flame gives you a clue about how efficiently the combustion is taking place. A blue flame indicates complete combustion and the highest heat is being produced. An orange or yellow flame indicates insufficient oxygen or contamination in the fuel. To deepen this analysis at home, you can change the flame color by adding certain chemicals to the fuel (for example, adding borax turns the flame green). However, the most important test from a camping perspective is the "soot test." If the bottom of your pot is black, you need to increase the oxygen intake. If the flames are very high and uncontrolled, you should try reducing the jet holes or narrowing the fuel chamber. The flame should not spread too much after hitting the bottom of the pot; if the flame is spilling over the edges of the pot, it means energy is being wasted.
What Safety Precautions Should Be Taken When Converting a Camping Stove into a Tent Heater?
A small camping stove can be converted into a tent heater in emergencies with the right modifications. The safest way to do this is to place an inverted clay pot or a thick metal box over the stove. These objects absorb the heat and radiate it as radiant heat to the surroundings. However, lighting a stove inside a tent is extremely dangerous due to the risk of carbon monoxide poisoning. If you must do this, ensure that the tent is fully ventilated and that the stove is on a stable surface that won't tip over. Additionally, you must extinguish the stove before going to sleep. Placing a fireproof mat or a large tray under the stove against the risk of fire prevents any small sparks from igniting the tent floor.
What is the Role of the Coin as a Pressure Valve in Penny Stove Models?
The "Penny Stove" gets its name from the coin that covers the filling hole in the center of the stove. In this design, the weight of the coin acts as a check valve. As the stove heats up, the internal pressure increases, and the coin ensures that the gas only escapes through the jet holes. If the pressure rises to a dangerous level, the coin slightly shifts to allow excess gas to escape. When making this model at home, you should use a coin that fits snugly over the hole and won't melt even when heated. You can ensure a better fit by roughening the bottom of the coin so that it sits better against the metal. This simple yet ingenious engineering solution helps the stove operate safely and at high pressure, preventing it from going out even in windy conditions.
Which Fibrous Materials at Home Can Be Used as Fuel Absorbers Instead of Carbon Felt?
Carbon felt, used to prevent the fuel from sloshing inside the stove and to create a wick effect, is not found in every home. Instead, you can use pieces of insulation material known as "mineral wool." If that is also unavailable, you can roll up pieces of fabric cut from an old pair of jeans and tightly place them inside the stove. Cotton fabrics absorb alcohol well but can quickly burn if they come into direct contact with the flame. Therefore, instead of burning the fabric directly, you should cover it with a fine metal mesh to allow the steam to escape upwards. Additionally, filling the stove with charcoal pieces without turning them into dust is surprisingly effective in holding the fuel. Charcoal, due to its porous structure, traps the alcohol inside and provides a stable vapor release during combustion.
What Measurements Are Needed to Make a Rocket Stove from Paint Cans?
Rocket stoves are systems that have an "L" shaped combustion chamber and produce very high heat with very little wood. To make one at home, you need a large paint can (outer body) and an elbow stove pipe (inner channel). The vertical part of the pipe should be at least twice as long as the horizontal part; this difference creates a strong airflow (draft). You should insulate the inside of the paint can by filling it with perlite, ash, or a sand-clay mixture that wraps around the pipe. Insulation prevents heat from escaping and allows the combustion chamber to heat up to 1000 degrees. This way, the wood burns so efficiently that only hot air comes out of the chimney instead of smoke. By placing a grill on top of this stove, you can cook long-lasting meals (like legumes) with very little wood.
How is the "Boil Test" Conducted at Home to Measure Combustion Efficiency?
The scientific way to understand how good your stove is is the "Boil Test." For a standard test, prepare 500 ml (about 2 cups) of water at 20 degrees room temperature. Put a specific amount of fuel in your stove (for example, 30 ml of alcohol) and start boiling the water. Use a stopwatch to note the time it takes for the water to start boiling. After boiling is finished, measure the remaining fuel to find the total consumption. A good homemade stove should be able to boil 500 ml of water in 5-7 minutes. If this time exceeds 10 minutes, your heat loss is too high; you should reconsider your draft design or jet holes. Also, testing with the lid on the pot simulates real usage conditions better. By recording this data, you can quantitatively see the performance differences between different designs.
How to Maintain the Hand Tools You Will Use When Making Your Own Camping Stove?
To produce good equipment, you need sharp and well-maintained tools. Renew the tip of the utility knife you use to cut tin cans after each project; a dull knife can cause tearing of the metal and injury to your hands. After using metal scissors, lightly oil them to prevent rusting. Use your drill bits at low speed to prevent overheating. For your safety, always wear cut-resistant gloves and protective eyewear when working with metal. After the project is finished, don't forget to clean the burrs on the edges of the stove with fine sandpaper; these sharp edges can cause serious injuries when trying to set up the stove in the dark outdoors. can lead to injuries. Maintaining your tools will save you time and improve quality in your next DIY project.
Making your own camping stove is not just about creating a tool, but a craft that strengthens the bond between you and nature. With the specific information in this guide, you are now ready to design both economical and high-performance stoves. Remember, the best stove is the one that best meets your needs and that you have made with your own hands. Safe camping!