Why Should You Stay Away from City Lights for Stargazing and Star Photography?
City lights create a massive glare that overwhelms the faint starlight in the sky, known as "light pollution" in the modern world. For a photographer wanting to do star photography, this glare is an obstacle that prevents the sensor from capturing the photons it tries to catch. The yellow and white lights of the city reflect off dust and moisture molecules in the atmosphere, causing the sky to appear orange or gray instead of black. A pitch-black background is essential for a real Milky Way shot; only then can the deep contrast between stars and the colors of nebulas emerge. Therefore, professional astrophotographers aim to choose a shooting location at least 50-100 kilometers away from civilization.
How is the Bortle Scale Used to Determine Star Photography Quality?
The Bortle Scale is a scientific standard that rates the darkness of a region's night sky from 1 (darkest) to 9 (brightest). For campers doing star photography, areas rated Bortle 1 and Bortle 2 are considered the "holy grail." At these levels, the Milky Way is so bright that it can cast shadows on the ground, and the horizon line is completely black. In areas above Bortle 4, light pollution begins to swallow details. Checking the Bortle rating of your camping area in advance through light pollution maps directly determines the quality of the photo you will take and how much difficulty you will face in the editing phase. For the best results, always prefer the least light-polluted highlands or valleys.
Is Melikler Plateau the Darkest Sky Point in Turkey?
Located in the Yenişarbademli district of Isparta, Melikler Plateau is the first and most important route that comes to mind when talking about astrophotography in Turkey. According to measurements, it has been certified as one of the darkest areas in Turkey and hosts international sky observation events every year. Situated at an altitude of approximately 1700 meters, the plateau is completely shielded from the light spill of surrounding districts thanks to the steep mountains around it. While camping here, you can see the magnificent structure of the Milky Way in its arc shape with all its details with the naked eye. Melikler Plateau is an indispensable natural studio for star photography enthusiasts due to its accessibility and the incredible level of darkness it offers.
How Suitable Are the Peaks of the Taurus Mountains for Milky Way Photography?
The Taurus mountain range offers unparalleled opportunities for photographers seeking to escape the humid air of the Mediterranean and reach a high-altitude dry atmosphere. Especially the high plateaus of Antalya and Mersin are among the points where atmospheric distortion is minimal due to their elevation thousands of meters above sea level. This high altitude allows stars to appear clearer and sharper. Camping in the unpolluted parts of the Taurus not only provides darkness but also offers sharp rocky formations and ancient cedar trees that will add aesthetics to your photo frames. However, it should be noted that the night temperatures can drop suddenly in these areas, and wildlife can be active, so a well-prepared camping plan should be made.
Is There Light Pollution in the Depths of Yenice Forests?
Yenice Forests, located within the borders of Karabük province, is considered one of Turkey's most pristine natural areas. When you delve into the depths of this vast forest ecosystem, you become completely isolated from the lights of settlements thanks to the dense tree cover and rugged terrain. While camping in Yenice, it is possible to capture stars filtered through the massive beech and fir trees that envelop the sky like a dome. In this valley, where light pollution is almost negligible, even during long exposure times, the ground color of the sky remains deep black. This ensures that colors appear much more natural and vibrant during the post-production phase.
Why Should the Eastern Anatolian Plateaus Be Preferred for Winter Star Photography?
The high plateaus and plains of Eastern Anatolia achieve incredible transparency during the winter months as humidity freezes. Cold weather minimizes the water vapor in the atmosphere, ensuring that the sky is "crystal clear." When the high plateaus between Erzurum, Erzincan, and Kars are covered with snow, they create a bright white surface that reflects the faint light from the stars. This situation is unique for astrophotographers who want to capture the texture of snow in the foreground and the star rain in the sky in the same frame. Despite the challenging winter conditions, the clarity of the sky in these regions is far superior to many points in western Turkey.
How Do Stars Appear in the Unpolluted Bays of Gökçeada and Bozcaada?
These islands in the middle of the Aegean Sea are incredibly dark spots as they are isolated from the bright city lights on the mainland by sea. Especially areas like the Hidden Harbor or Star Bay at the western tip of Gökçeada, where there are no settlements, offer a vast dark area where the sea meets the horizon line. In star photography taken on the islands, capturing the reflections of stars on the calm sea during still nights creates wonderful compositions. However, the wind factor on the islands is very strong; therefore, using a heavy and sturdy tripod is critical for obtaining sharp images. Cleaning after the shoot should not be neglected to prevent sea salt from damaging the equipment.
Is the Atacama Desert the Best Star Photography Spot in the World?
The Atacama Desert in Chile is considered one of the driest places on earth and is referred to as the "sky of the earth" due to its high altitude. It is no coincidence that the world's largest telescopes are set up here; more than 300 days a year, the sky is completely cloudless. Camping in Atacama is the ultimate experience a photographer can have in their life. The Milky Way photos taken here are so sharp and detailed that they cannot be seen anywhere else due to the thinness and dryness of the atmosphere. Capturing different star clusters and the Magellanic Clouds in the southern hemisphere makes this journey a must-do for every astrophotographer before they die.
Why Is the Sky So Clear in Namibia's Namib Desert?
Namibia has one of the lowest population densities in the world, resulting in almost no artificial light pollution. The Sossusvlei region within the Namib Desert is famous for its massive red sand dunes and turns into a complete star paradise at night. Camping on top of the dunes offers you an unobstructed horizon line of 360 degrees. The extremely dry air prevents dust and moisture from interfering with the starlight. Namibia's parks, which have international "Dark Sky Reserve" status, provide an enchanting atmosphere not only for professionals but also for every camper who wants to sleep under the stars. The sky here is so crowded that sometimes you may even have difficulty picking out the constellations you know.
What Are the Challenges of Camping Under the Northern Lights in Iceland?
Iceland is not only a popular destination for star photography but also for capturing the dance of the Aurora Borealis (Northern Lights). However, camping in Iceland poses a significant challenge due to constantly changing weather conditions and strong winds. While the long nights in winter increase the shooting time, freezing temperatures can cause camera batteries to drain quickly. To photograph the Northern Lights along with the stars, you need to choose a location where the sky is dark and monitor solar activities. The volcanic black beaches of Iceland add dramatic depth to star photos as a foreground element.
How to Capture Star Images Resembling Mars Atmosphere in Wadi Rum Desert?
Wadi Rum in Jordan, known for its red sands and massive sandstone mountains, is also referred to as the "Valley of the Moon." Camping here gives you the feeling of being on another planet. In the desert's dryness, photos taken without any artificial light source allow the star density in the sky to gently fall on the red rocks and provide natural illumination. When doing star photography in Wadi Rum, using the massive rock arches or Bedouin tents as a foreground helps you create powerful frames with a story. The silence and darkness of the desert prepare a perfect scene for you to capture the core region of the Milky Way in all its glory.
What Are the Best Camera Settings for Astrophotography?
Star photography is a technical discipline, and the basic settings must be done correctly. Lenses with the widest aperture (f/2.8 or lower) are generally preferred. The ISO value should be kept between 1600 and 6400, depending on your camera's sensor performance; however, it should be noted that very high ISO can lead to "noise." The most critical setting is the "500 Rule"; this rule helps you calculate the maximum exposure time needed to prevent stars from trailing due to movement. For example, with a 20mm lens, an ideal exposure would be 500/20=25 seconds. Focusing should be done manually and precisely adjusted to the "infinity" point.
Why Are Wide-Angle Lenses Important in Star Photography?
To capture the vastness of the sky and the arc of the Milky Way in a single frame, wide-angle lenses between 14mm and 24mm are typically used. A wide angle allows you to include not only the sky but also your camping tent, a tree, or a mountain peak as a foreground. A star photo without a foreground element often lacks depth perception and creates a feeling of "emptiness" in the viewer. Additionally, wide-angle lenses allow for longer exposures according to the 500 rule, letting more light into the sensor. This means brighter and more detailed star images.
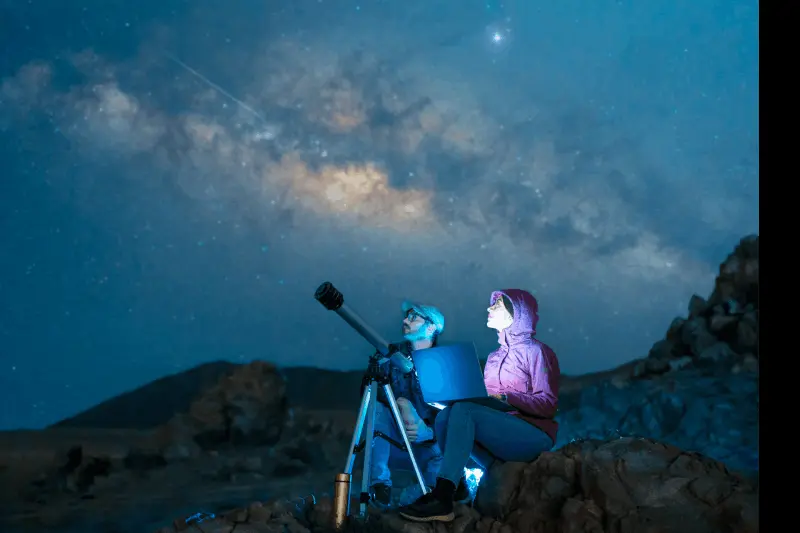
Is It Necessary to Use a Star Tracker?
If you want to capture very professional, deep-sky objects (nebulae, galaxies) or very low-grain images, you need to use a star tracker. These devices rotate in the opposite direction of the Earth's rotation speed, synchronizing your camera with the stars. This allows you to expose for much longer periods, such as 3-5 minutes instead of 30 seconds, while keeping the stars as points. When using a tracker, the ISO value can be reduced, which significantly increases the dynamic range and sharpness of the photo. However, setting up these devices requires precise alignment with a polar star, so it takes patience and practice.
How Are Light Pollution Maps Used in Choosing a Camping Site?
Interactive maps like "Light Pollution Map" or "Dark Site Finder" on the internet are the biggest helpers for star enthusiasts. These maps use satellite data to show the light intensity at every point on Earth with color codes. Black and dark blue areas are the most ideal places for shooting, while red and white areas should be avoided. Finding a "dark island" on these maps before determining your camping route prevents you from going to a place in vain. Additionally, by examining the terrain and transportation routes on these maps, you can identify a location that is both safe and rich in photographic opportunities.
Why Is the New Moon Phase the Most Suitable Time for Star Photography?
The moon is the brightest natural light source in the sky and can completely obscure the Milky Way during the full moon phase. The moonlight illuminates the atmosphere so much that it makes stars disappear as if you are shooting during the day. Therefore, for a successful star photography session, you should choose the "New Moon" phase, meaning the days when the moon is not visible in the sky or is just a very small crescent. If the moon is in the sky, you need to wait for sunset or finish shooting before moonrise. In some cases, a 10-15% crescent can be advantageous for slightly illuminating the foreground, but the general rule is always "the darker, the more stars."
How to Prevent Camera Shake During Long Exposures?
In star photography, the camera must not move even a millimeter during exposure times of 20-30 seconds. The slightest vibration can ruin the sharpness of the stars. To prevent this, you should use a very sturdy tripod that does not shake in the wind. Even pressing the shutter button with your hand can cause vibrations, so a remote control (intervalometer) or the camera's 2-10 second timer should be used. If you are in a windy area, hanging your bag on the tripod can lower the center of gravity and increase stability. Additionally, the "Image Stabilization" (IS or VR) feature on the lens should be turned off while on the tripod; because this system can sometimes create vibrations on its own.
What Are "Dark Frame" and "Flat Frame" in Astrophotography?
Professional-level photo processors do not just shoot the sky during the shooting. A "Dark Frame" is taken with the same settings and with the lens cap on; this frame is used to determine the thermal noise in the sensor. A "Flat Frame" is taken to detect vignetting and dust spots on the sensor. When these auxiliary frames are combined with the original photo in a computer environment (stacking), the resulting image is much cleaner, purer, and flawless. This patience-requiring process is what creates the difference between an ordinary photo and a display-quality work of art.
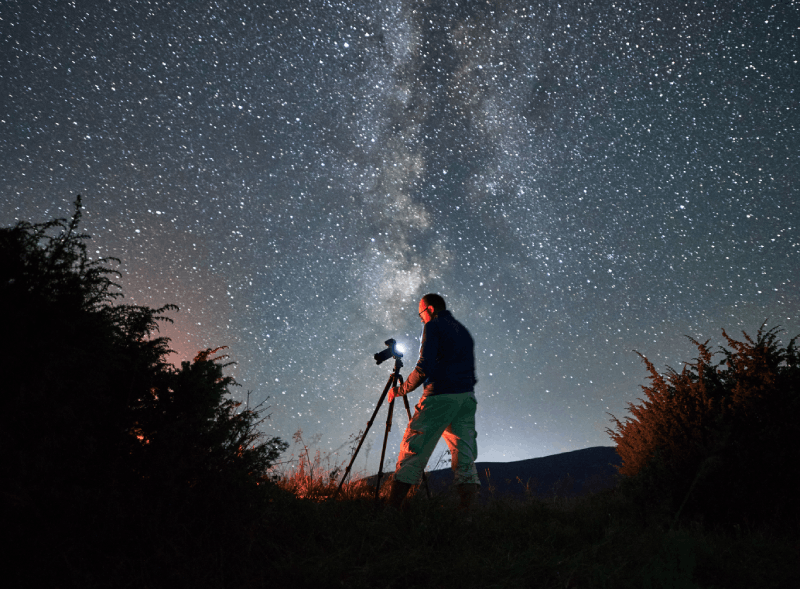
Why Is Using Red Light Important in Night Photography?
The human eye needs about 20-30 minutes to adapt to darkness. If you look at a bright white light or a phone screen during shooting, your pupils immediately constrict, and you lose the ability to see the faint details in the sky. However, red light does not disrupt the night vision of the eye. Therefore, it is essential to use a red light headlamp while setting up your camping area and camera settings. Avoiding the use of white light for the comfort of both you and other photographers nearby is one of the fundamental rules of astrophotography ethics.
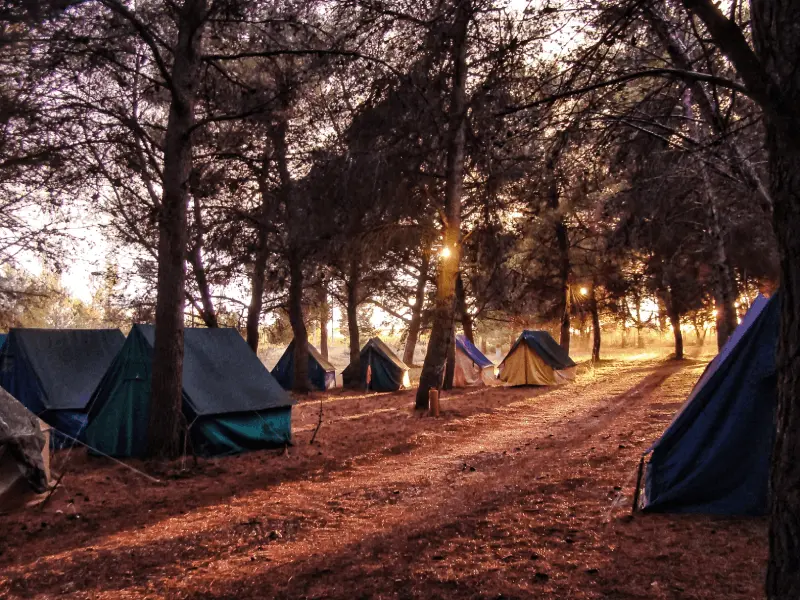
How Should Camping Equipment Be Selected for Star Photography?
Not only camera equipment but also a comfortable camping experience is key to a successful shoot. Regardless of the season, wearing layers and thermal clothing is vital since you will be waiting outside all night; because staying still quickly lowers body temperature. A comfortable camping chair, a warm thermos of tea or coffee, and energy-boosting snacks keep your motivation high. Additionally, since you will be camping in unpolluted areas, you should also carry safety equipment such as power banks, maps, and a first aid kit. A well-rested and alert photographer can capture much more creative frames.
Is It Possible to Do Star Photography with a Phone?
Thanks to advancing technology, new generation smartphones can perform basic level star photography with "Night Mode" or "Pro Mode" options. By raising the ISO in manual settings and setting the exposure time to 30 seconds, you can capture the outlines of the Milky Way by placing the phone on a stable surface (or tripod). Of course, they do not provide as much detail as a professional DSLR or mirrorless camera, but they can yield quite impressive results for social media posts. Choosing RAW format while shooting on the phone gives you more flexibility when adjusting colors and contrast later.
Which Software Is Used to Edit Sky Photos?
Star photos usually appear dull and raw in the form they come out of the camera. Adobe Lightroom and Photoshop are the most commonly used tools to reveal the true potential of these photos. Especially the "Dehaze" and "Clarity" settings make the stars more distinct. Additionally, special software like "Sequator" (Windows) or "Starry Landscape Stacker" (Mac) is used to reduce noise by stacking multiple frames on top of each other. During the editing phase, adjusting the color balance correctly (usually around 3500-4000 Kelvin) is crucial to preserve the natural depth and cosmic colors of the sky.
What Are the Tips for Camping During Meteor Showers?
Meteor showers like Perseids or Geminids are natural events that add excitement to star photography. When camping during these periods, directing your camera towards the center where the meteors radiate (the radiant point) increases your chances of capturing them. Using an intervalometer to take hundreds of shots in burst mode ensures that you will catch at least a few bright meteors in some frames. Since meteors are momentary events, high ISO and shorter exposures can sometimes yield better results. You should avoid lighting a campfire during meteor showers; because the light from the fire tires your eyes and negatively affects your camera's sensor.
What Are the Advantages and Disadvantages of Star Photography at High Altitudes?
High altitude means thinner atmosphere and fewer air molecules. This results in less scattering of starlight and clearer photos. However, at high altitudes, the oxygen level is lower, which can lead to quick fatigue or headaches. Additionally, weather conditions can change much faster at high altitudes, and storms can be more severe. When camping at these points, you should ensure that your equipment is extra protected against the wind and give your body time to acclimatize to the altitude. The advantage is that you have a chance to find a clear sky even when the clouds are below you.
How to Capture Star Trails Photos?
Star trails photos, which visualize the rotation of the Earth, are the result of hours of patience. There are two methods: You can either expose for 30-60 minutes in a single frame (which can cause overheating and noise in digital sensors) or take hundreds of 30-second photos and combine them with software. The second method is much safer. If you center on the North Star (Polaris) in these photos, you will see that the stars draw a perfect circle. Leaving a soft light inside your camping tent creates a glowing home feeling in the foreground, adding a fairy-tale atmosphere to the photo.
How to Prevent the Effects of Humidity and Dew on the Lens?
When the night temperature drops, humidity in the atmosphere can condense on the lens glass, creating "dew." This can completely ruin your shot as the fogging of the glass blurs the images. To prevent this, small belts that work with USB called "lens warmers" can be used. If you don't have a warmer, wrapping a hand warmer around the lens with a rubber band is also a useful "hack" method. Additionally, do not start shooting immediately after taking your camera out of the car or warm tent; waiting for the equipment to acclimatize to the outside temperature will also prevent fogging.
How to Include Light Painting in Star Photos?
In a completely dark camping area, the technique of "light painting" is used to make a rock or tree in the foreground visible. While the long exposure continues, you can "paint" the object by briefly moving a low-powered flashlight (preferably warm-colored) over it. The key word here is "less light"; a very powerful flashlight can blow out the object and create an unnatural image. Holding the light from the side enhances textures and shadows, adding depth. This technique is the most fun way to add a personal and artistic touch to your star photos.
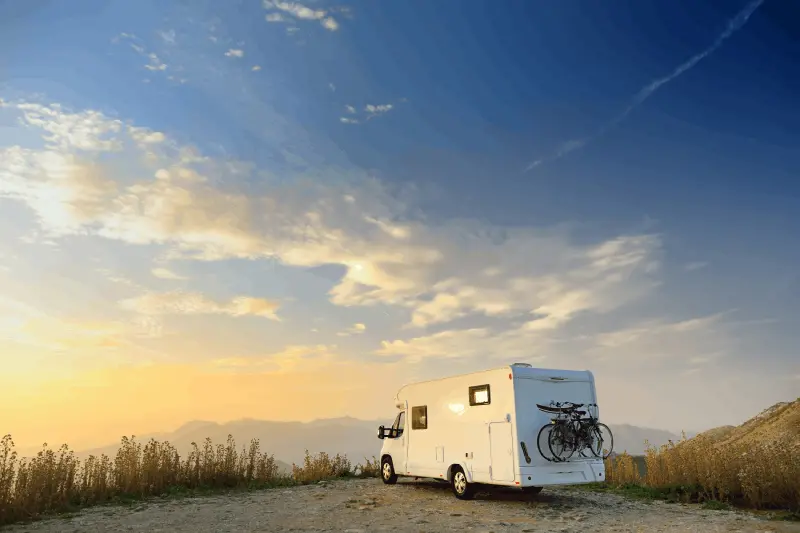
How to Plan Star Photography Trips with a Caravan?
Traveling by caravan provides great flexibility to find and stay in the darkest spots. However, the external lights of the caravan and the glare from the panels inside can affect your shooting area. You should turn off all lights while shooting and position the caravan in a way that blocks the wind. While the caravan's solar panels charge your batteries during the day, you can also charge your cameras and laptops overnight. Being able to live "off-grid" with a caravan will take you away from popular and bright camping areas and into the heart of true darkness.
What Are the Ethical and Environmental Protection Rules in Night Sky Photography?
The pristine and dark areas you go to for star photography are often sensitive ecosystems. Adhering to the "LNT" (Leave No Trace) principles, bringing back your trash, and not damaging the natural vegetation is the duty of every camper. Additionally, if you are in an area where other observers or photographers are present, not speaking loudly and not unnecessarily using bright lights is a basic rule of respect. Preserving the silence and darkness of nature is critical not only for you but also for the nocturnal animals living in that area. Remember that light pollution is not only a factor that disturbs the sky but also disrupts the ecological balance.
What Is the Role of Patience and Practice in Astrophotography?
A perfect star photo usually does not come on the first try. Due to weather conditions, equipment malfunctions, or incorrect settings, you may spend many nights "wasting" time. However, each unsuccessful attempt gives you the opportunity to better understand the sky, your camera, and nature. Trying different techniques, exploring different areas, and pushing your limits a little higher each time is the real enjoyable part of this hobby. Every night spent under the stars is not just about taking a photo; it is a meditative experience that reminds us of our place in the vastness of the universe. Be patient, enjoy the darkness, and keep pressing the shutter button.
Conclusion: Where Will the Darkest Sky Take You?
The journey of star photography takes you to the darkest yet most breathtaking spots on Earth. From Turkey's Melikler Plateau to Chile's Atacama Desert, each dark stop opens the doors to the universe a little more. When combined with the right equipment, technical knowledge, and a bit of luck, that one frame of a photo you capture brings home stories from thousands of light-years away. Don't be afraid to explore dark camping areas; because only in the deepest darkness can you see the brightest lights. Plan your next trip according to the sky calendar and collect unforgettable moments under the guidance of the stars.