Why Should Both Mosquito Nets and Sunshades Be Preferred in Caravan Windows?
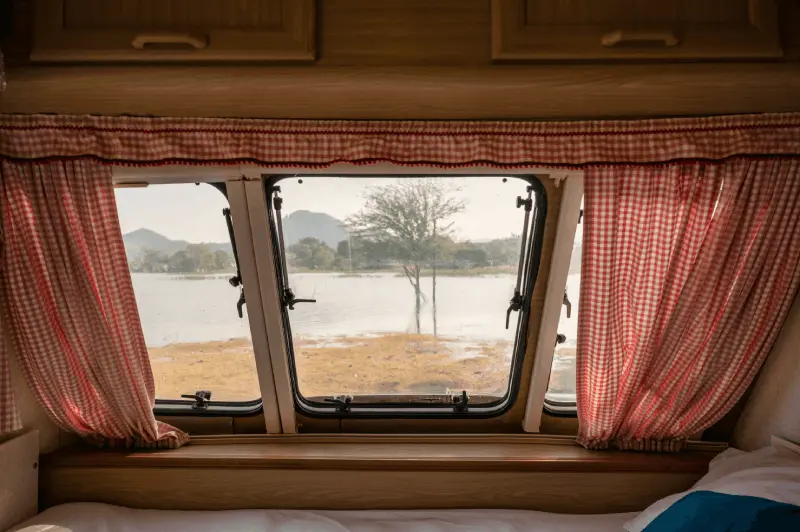
In caravan living, comfort is intertwined with nature while also relying on the ability to protect oneself from external factors. Mosquito nets installed on caravan windows prevent mosquitoes, houseflies, and other pests from entering the interior, especially when staying by the lake or in wooded areas during the summer months. This is essential for uninterrupted sleep and a hygienic living space. Sunshades not only provide privacy but also balance the internal warmth of the caravan. Thermal sunshades reflect sunlight, preventing excessive heating of the interior and minimizing the escape of heat during winter. Therefore, using these two systems together transforms your caravan into a livable home for all four seasons.
How to Accurately Measure Window Dimensions Before Installation?
The most critical stage of installation is taking accurate measurements. A mismeasured frame either prevents the glass from closing or causes light and insect leakage from the edges. When measuring, you should measure the width and height of the caravan window from the inside (the light area). However, measuring just the glass opening is not enough; you must also consider the width of the surface where the frame will sit on the flat ground. Checking whether the caravan walls are curved is important for the frame to fit perfectly. While standard measurements (for example, 50x30 cm, 70x40 cm) are often used, in custom-built caravans, millimeter measurements are crucial. Always apply the "measure twice, order once" rule when taking measurements to avoid costly mistakes.
What Are the Advantages of Cassette Mosquito Nets and Sunshade Systems Compared to Other Models?
Cassette systems are compact mechanisms where the mosquito net and sunshade are housed within a single aluminum or plastic casing. The biggest advantage of these systems is that they offer an aesthetic appearance and ease of use. Since they have a roller (screen) structure, they can be stopped at the desired level. Additionally, thanks to their cassette structure, the mosquito net fabric and sunshade are protected from external factors, dust, and the damaging UV rays of the sun when not in use. These models, which are more practical to install than other systems, give the caravan a professional factory appearance. Their long-term durability and hidden mechanisms make them the most popular choice among caravan users.
What Should Be Considered to Avoid Damaging Glass Seals During Installation?
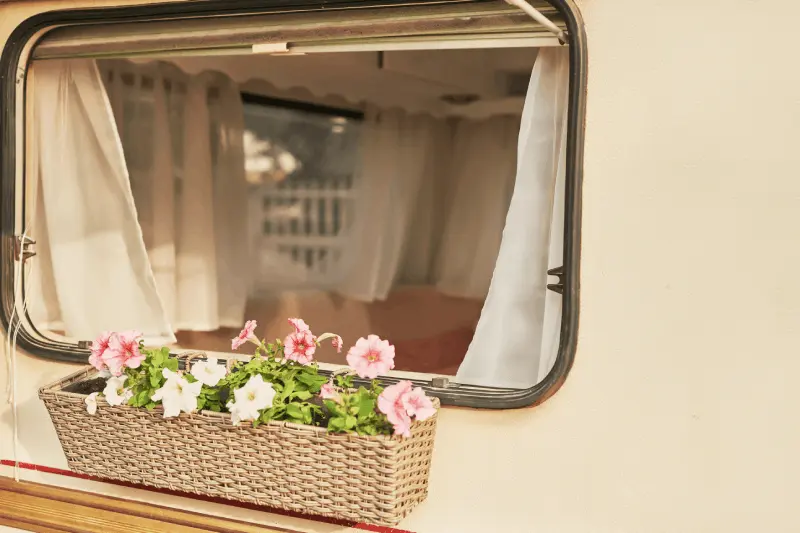
The rubber seals that ensure the tightness of caravan windows are the parts that require the most attention during installation. When screwing the mosquito net frame, the screws must not come into contact with these seals. It is essential to determine the exact position of the seal before drilling screw holes and to keep the drill bit away from this area. If the frame must rest on the seal, a gap should be left that does not crush the seal, or special spacer tools should be used. Excessive pressure on the seals can cause the rubber to deform over time and lead to water ingress in the caravan. After installation, it should be manually checked whether the seals can move freely and whether the glass closes completely.
What Is the Most Suitable Screw Type for Plexiglass Caravan Windows?
Most caravan windows are made of acrylic or plexiglass. These materials are hard but brittle. The type of screws to be used during installation should be selected according to the interior panel material of the caravan (plywood, MDF, or plastic coating). Screws made of stainless steel, with fine threads and pointed tips, are generally preferred. The length of the screws should not exceed the thickness of the caravan wall; otherwise, an unsightly hole may form from the outside. If the screw will come directly onto the plexiglass surface, it is necessary to drill a pilot hole with a drill bit slightly smaller than the screw diameter to prevent the material from cracking. Additionally, to ensure that the heads of the screws are embedded in the frame, a hole should be drilled, providing an aesthetic finish.
How to Dismantle Mosquito Nets on Old Type Caravan Windows?
Before installing a new system, it is necessary to remove the old one to create a clean working area. Old mosquito nets are usually held in place by hidden screws under plastic covers. First, carefully pry off these covers with a fine-tipped screwdriver without damaging them. Then loosen the screws but support the frame with your hand before completely removing it; because old systems may sometimes be supported by adhesive. If the frame is attached to the wall, gently heat the adhesive with a heat gun (or hairdryer) to soften it. Use a spatula to slowly separate the frame. Clean any old adhesive residues left on the wall surface with thinner or special cleaners to prepare for the new installation.
What Is the Difference Between Installing Aluminum Framed Systems and Plastic Frames?
Aluminum frames are generally heavier and more durable, thus may require more screw points during installation. The flexibility of aluminum is lower, so it is critical for the wall to be perfectly flat for successful installation. Plastic frames are lighter and can adapt somewhat to the slightly curved walls of the caravan. However, care must be taken not to overtighten when screwing plastic frames; excessive torque can cause the plastic to crack. It can open a path for the machine. In temperature changes, aluminum and plastic have different expansion rates. Therefore, keeping the screw holes a bit wider in aluminum frames can prevent the frame from contracting during seasonal transitions. The stability of the corners must be tested after installation in both materials.
How Should the Awning Be Positioned to Prevent Thermal Bridges in Plexiglass?
A common problem encountered with caravan windows is the accumulation of heat resulting from very little space between the sunlight and the glass. This situation can create a "thermal bridge" leading to excessive heating and cracking of the plexiglass. It is recommended to leave at least a 1-2 centimeter air gap between the awning and the glass surface during installation. If you are using a cassette system, mount the cassette slightly inward rather than at the top edge of the glass to allow air circulation. Especially since blackout awnings reflect a lot of heat, this gap will extend the lifespan of the glass. The ventilation gap will also significantly reduce condensation on the glass.
How to Choose the Right Screws for Caravan Interior Paneling?
The interior walls of caravans are usually made of thin poplar plywood or ABS plastic panels. When installing on these surfaces, it is better to use "washer screws" or "wide head screws" instead of standard screws to distribute the load over a wider area. If the interior panel is very thin, just using screws may not be sufficient; in this case, applying an adhesive (like Sika or similar mastics) to the back of the frame will increase strength. Using stainless screws is essential for durability, considering the high humidity levels inside the caravan. For aesthetic appearance, it is recommended that the screw colors match the frame or that screw cover caps are used.
How to Check Tension Adjustment of Spring Mechanisms During Installation?
In roller-type insect screens and awnings, the way the fabric or material is gathered at the top is dependent on spring tension. If you notice that the system is closing very slowly or very quickly during installation, you can adjust the tension using the adjustment screw on the side of the cassette. Over-tightening the spring can shorten the lifespan of the mechanism and cause the cords to break; leaving it too loose can cause the fabric to sag and lead to aesthetic issues. The ideal adjustment is to have the fabric roll up without being too tight when released. After installation, open and close the system at least 10 times to ensure the mechanism operates stably.
Is It Necessary to Use Adhesive When Installing Corner Connection Accessories?
Most cassette insect screen systems are assembled by connecting four main parts (two side rails, one top cassette, one bottom rail). Corner connection accessories lock these parts together. While just screwing them together is usually sufficient, due to the constant movement of the caravan and exposure to vibrations, applying a small amount of plastic adhesive or quick adhesive to the corners strengthens the structure. This process also prevents any rattling noises that may develop over time. However, care should be taken when using adhesive; if you need to change the fabric later, excessive adhesive can make the removal process impossible. Be sure to use a square to ensure the corners are at a 90-degree angle.
How to Eliminate Slack When Placing the Insect Screen Fabric in the Channel?
One of the most frustrating moments during installation is when the insect screen fabric slides to one side or gathers in the middle, causing slack. This situation usually arises from the side rails not being mounted perfectly parallel to each other. If there is slack or bulging on one side, measure the distance between the side rails from the top and bottom millimetrically. Even a one-millimeter deviation can cause the fabric to wrap unevenly over a long distance. To eliminate slack, fully open the fabric and ensure it is re-rolled tightly while slightly stretching it. If the problem persists, check the point where the fabric is attached to the bottom rail and ensure it is evenly distributed across the channel above the fabric.
Is It Possible to Install an Awning Without Blocking Night Vision?
Caravan owners sometimes want to see outside while also preventing the light inside from spilling out. In this case, dual systems come into play. Systems that offer "semi-transparent" fabrics and "blackout" fabrics together can be preferred during installation. If you adjust the installation level to lock the awning at a medium level instead of fully closing it, you can reduce the sun's scorching effect while preserving the view outside. Additionally, in some systems, the awning works from the bottom up, while the insect screen works from the top down. This type of installation allows for ventilation from the bottom while providing privacy from the top. Installing with these needs in mind enhances the enjoyment of use.
How to Install Flexible Frames for Curved Caravan Windows?
The windows used in many panel vans are curved to fit the vehicle's outer body. However, insect screen frames are generally straight. In this case, there are two ways to install: either add a wooden or plastic strip (frame) to cover the curvature at the bottom of the frame, or use flexible frames. Trying to force a straight frame onto a curved surface can lead to both breaking the frame and jamming the mechanism. Before installation, measure the deepest point of the curve and create a flat platform for the insect screen by supporting this gap with filler material. This will ensure the mechanism operates smoothly. ar.
Can Magnetic Screens Be Removed While the Caravan is in Motion?
Magnetic screens are a great alternative for caravan owners who do not want to drill holes or are looking for a temporary solution. However, the quality of the magnets used in the installation of these systems is crucial. If the components are weak, the screen may open due to the vibrations of the caravan or the effects of the wind. Strong neodymium magnets should be preferred for installation. The surface where the component will be applied must be completely cleaned with alcohol, and it should be waited for 24 hours for the adhesive to fully cure. If the magnetic strength is sufficient, they will not come off while in motion. Still, it is a good habit to check that the screens are closed and secure before going on a long trip.

What Should the Installation Distance Be to Preserve the Heat Reflective Feature of the Sunshade Fabric?
The surface of the sunshades facing outside is usually covered with a layer of aluminum foil or silver-colored reflective material. For this layer to effectively reflect heat, it should not come into contact with the glass. If the fabric touches the glass, it will allow heat to enter through "conduction" instead of reflecting it. During installation, the cassette should be positioned approximately 1.5 - 2 cm inside from the glass, ensuring that this reflective feature works at maximum efficiency. Additionally, ensuring that the gaps at the edges of the fabric are completely covered by the side rails not only prevents "light leakage" but also weakens the heat shield effect. The correct distance means less operation of the air conditioning inside the caravan and energy savings.
Where Should Insulation Tapes Be Applied to Prevent Rattling Sounds After Installation?
Keeping the interior of the caravan quiet while in motion is key to comfort. If the screen frame directly contacts the wall, it can create a constant rattling sound (trim noise) due to vibrations. To prevent this, thin sponge strips or self-adhesive rubber tapes should be applied to the back surface of the frame that touches the wall, with a thickness of 1-2 mm before installation. You can also place small felt pieces under the moving parts on the inner side of the side rails. Using plastic washers while tightening screws also prevents metal from rubbing against metal or plastic against the wall. These small details permanently prevent annoying noises during travel.
What Are the Methods for Installing Without Drilling That Do Not Damage the Original Structure of the Caravan?
For users who do not want to drill into the interior walls of their caravan, there are manufacturing methods or compression systems available. High-strength double-sided tapes (VHB tapes) or hybrid polymer adhesives can securely hold lightweight screen frames. However, surface preparation is very important in this method; a clean and dust-free surface is essential. Another method is "tension frame" systems that fit tightly into the window opening without any screws. However, it should be noted that adhesives can soften in very hot areas, so it is always safer to support them with small hidden screws at least from the corners.
Are the Installation Challenges of Blackout Shades Different from Semi-Transparent Shades?
Blackout shades are usually made from thicker and heavier fabrics. This weight increases the load on the side rails during installation. For complete blackout, the side rails must sit flush against the wall, and the fabric must not extend outside the channel within the rail. Semi-transparent fabrics are more flexible and can tolerate small errors in installation more easily. In blackout shade installation, it is recommended to install small plastic pieces called "light seals" in the corners to prevent even the slightest light leakage. Adjusting the spring tension according to the fabric thickness is also the most important technical difference between these two types.
How to Integrate Safety Locks for Caravan Owners with Children?
Caravan windows are usually at a height that children can easily reach. When installing the screen system, it is vital to add safety locks that will prevent children from opening the screen or window uncontrollably. Some modern screen models come with self-locking bottom latches. If your system does not have this, you can install simple "stop" latches on top of the side rails. These latches ensure that the screen can only be opened to a certain level. Additionally, opting for spring or motorized hidden systems instead of corded systems prevents the cords from wrapping around children's necks, elevating safety in the caravan to a higher level.
What Should Be Done If the Caravan Window Handle and Lock Mechanism Hit the Screen Frame?
This is the most commonly encountered "geometric" problem in caravan installations. When the screen frame is installed, it may restrict the range of motion of the handles or locks that are used to open the glass. To solve this problem, fully open and close the glass before installation to mark the path followed by the handles. If there is contact, install the screen mechanism 1-2 cm further away from the wall using "depth spacers". Alternatively, you can replace them with "low-profile" window handles offered by some manufacturers. Your goal should be to create an ergonomics that allows you to lock the glass comfortably without needing to open the screen.
How Does the Drying Time of the Mastics Used During Installation Affect the Process?
If you are using adhesive mastic during installation, timing is everything. After applying the mastic to the back of the frame, do not start screwing immediately; allow the mastic to "skin over" slightly for a few minutes. Waiting for the mastic to set is better for adhesion. However, you should tighten the screws before the mastic completely dries so that it spreads over the surface and acts as a seal. After the mastic dries (usually after 24 hours), you can clean the excess that extends from the edges of the frame with a utility knife. Not moving the caravan before complete drying prevents the frame from shifting due to vibrations. It is advantageous to perform the installation in dry weather as humid air can extend the drying time.
What is the Critical Role of Brush Seals in the Insect Screen Mechanism Installation?
The small brushes located at the bottom of cassette insect screens and on the side rails are not just aesthetic. These brushes close the gap between the fabric and the frame, preventing even the smallest fruit flies from getting inside. During installation, ensure that these brushes are not crushed or jammed into the rail. If the frame is not perfectly parallel to the wall, the brushes may remain open on one side. The complete sealing of the brush seals against the glass or wall also prevents dust from entering and stops the fabric from fluttering excessively in the wind and making noise. Replacing worn brush seals with new ones during the installation phase increases the system's efficiency by 100%.

What are the Frame Color Selection and Painting Techniques Suitable for the Interior Decoration of the Caravan?
Insect screen frames usually come in white, cream, or anthracite colors. If the color of your caravan's furniture does not match, you can paint the frames before installation. Electrostatic powder paint is best for aluminum frames, but if you are doing it at home, you must use a "metal primer." For plastic frames, acrylic spray paints that can adhere to plastics should be preferred. Perform the painting process before installation, while the parts are still unassembled. Don't forget to mask the moving parts and the channels where the fabric passes with masking tape; paint residues can cause the mechanism to jam. Choosing the right color ensures that the insect screen looks like a part of the caravan rather than just an accessory.
What are the Differences in the Installation Guides of Imported and Domestic Production Insect Screen Systems?
Installation guides for imported brands like Remis and Dometic are generally very detailed and come with special templates. By applying these templates to the wall, you can accurately determine the hole locations. In domestic productions, the guides may sometimes be insufficient. In this case, instead of using "trial and error" while installing, use the frame itself as a template. While imported products generally use metric screws and special clips, standard sheet screws may be preferred in domestic products. Regardless of which system you use, not exceeding the torque values specified by the manufacturer and paying attention to the interlocking directions of the parts (indicated by arrows) minimizes installation errors.
What is the Ideal Tension to Prevent the Sunshade Cords from Breaking During Installation?
In pleated (plisse) systems, the alignment of the holes through which the cords pass and the tension of the cords determine the lifespan of the system. If the cords are too tight during installation, the tension increases and the cord may break in a short time; if they are too loose, the pleated fabric will sag. The ideal tension should be enough to keep the fabric in place when you release it. Ensure that the plastic corner fittings through which the cords pass are unobstructed. If a cord is getting stuck somewhere, smooth that area with fine sandpaper. After installation, spraying a very small amount of silicone spray on the cords can reduce friction and extend the lifespan of the cords for years.
How to Install Moisture Resistant Mounting in Bathroom and Kitchen Windows?
In installations made in humid areas like bathrooms and kitchens, corrosion is the biggest enemy. In these areas, 316 quality stainless steel screws must be used. It is important that the mastic applied behind the insect screen frame has waterproof properties (like antibacterial silicone). Additionally, to prevent mold from forming in the insect screen fabric due to moisture, "fiberglass" fabrics should be preferred during installation. On the kitchen side, cassette systems with fully closed models are more suitable to prevent cooking vapors (oil particles) from clogging the mechanism. A mounting plan that does not block the ventilation channels will also prevent moisture from being trapped inside.
Is it Logical to Install Insect Screens from the Outside of the Caravan?
Generally, caravan insect screens are mounted on the inside, but in some special cases (for example, in non-opening sliding glass), external mounting may be necessary. The biggest challenge of external mounting is that the system is exposed directly to sunlight, rain, and wind. In this case, the material used must be UV resistant, and the screws must be isolated with exterior-grade mastic to prevent water ingress. Since the insect screen will get dirty very quickly when mounted externally, it is important that it is designed to be easily removable and cleanable. Aesthetically, it should generally be considered as a last resort since it may disrupt the external lines of the caravan.
How Do Air Leaks Resulting from Installation Errors Affect Caravan Heating?
If there is a gap between the insect screen frame and the wall, there will be a continuous air circulation through this gap. In winter, the warm air inside escapes from here, while in summer, the hot air outside enters. This causes your heater or air conditioner to consume more energy. At the end of the installation, check for air flow around the frame by moving a candle or lighter flame around it. If there is a leak, seal those areas with transparent mastic or thin sponge strips. Good insulation not only protects against insects but also helps maintain your caravan's energy efficiency. ektir.
Why is Proper Alignment of the String Paths Important in the Installation of Pleated (Accordion) Insect Screens?
Pleated insect screens are indispensable for modern caravans with their aesthetic structures. These systems operate by a series of strings passing through the fabric. During installation, the top and bottom rails must be aligned millimetrically. If the bottom rail is slightly ahead or behind, the strings will be pulled diagonally, disrupting the folding arrangement of the fabric. This can lead to tearing of the fabric or breaking of the strings. Always use a level during installation and ensure there are no burrs or screw heads inside the channels through which the strings pass. A smooth string path ensures that the pleated system operates quietly and fluidly.
How to Reinstall the Insect Screen After the Caravan Window is Repaired?
Sometimes you may need to remove the insect screen system for glass breakage or hinge replacement. When reinstalling, instead of using the old screw holes, filling these holes with wood filler and letting it dry will ensure that the new screws hold more securely. If you are going to use the old holes, prevent stripping by using a larger screw. Be sure to replace any deformed seals or sponges during disassembly. Cleaning any dust that may have accumulated inside the mechanism and lubricating the rails with silicone spray will restore the system to its original performance.
How to Calculate Material Expansion in Installations Made in Winter Conditions?
Plastic and aluminum parts contract in cold weather. If you are installing in freezing conditions, do not clamp the parts too tightly together. When the weather warms up in summer, these parts will expand, and if no allowance is made, the frame may warp or crack. The ideal installation temperature is between 15-25 degrees. If you must install in winter, heat the inside of the caravan thoroughly and wait for the materials to reach room temperature. Keeping the screw holes slightly wider ("tolerance allowance") will allow for seasonal movement of the materials.
What are the Ways to Install Without Voiding the Warranty on Caravan Window Accessories?
Many quality insect screen systems are under warranty, but improper installation can void this warranty. To protect the warranty, use the original screws and mounting brackets that come with the product. Do not make unauthorized holes in the body of the product (especially in the cassette part). If a piece does not fit properly, contact the manufacturer instead of forcing it. Photographing the installation process can serve as proof in case of a manufacturing defect that may arise later. Additionally, confirm whether the warranty remains valid for installations made outside of authorized service during the purchase phase.
What Should the Final Checklist Include After Installation is Completed?
When you have completed the installation, be sure to follow these steps:
1- The insect screen and curtain should be fully opened and closed at least 5 times.
2- The locking arms of the glass should operate smoothly without hitting the insect screen.
3- Lights should be turned off, and any light leakage from outside should be checked.
4- Check for any play or rattling by applying pressure to the frame with your hand.
5- Ensure that the screw concealment caps are fully seated.
6- Inspect the fabric for any snags or tears. These final checks will prevent you from encountering surprises when you hit the road and ensure you receive the value of your effort.