Owning a caravan may seem like a door opening to freedom, but making the wrong choice can turn this dream into a nightmare. The biggest enemy of a caravan is not rust, but rather the insidious advance of water leaks and moisture. In this content, we will examine in detail what you need to pay attention to before purchasing a caravan, how to detect hidden dangers, and how to conduct a professional inspection.
The Importance of Moisture Control When Buying a Caravan
Caravans are generally constructed with sandwich panels made from a combination of wood, composite, and metal materials. While this structure provides lightness, if water enters, it can cause the structure to deteriorate from the inside out. When moisture reaches the skeleton of the caravan, it initiates a damage process that is very difficult and costly to reverse. Most of the time, leaks go unnoticed from the outside; water accumulates behind wall panels or between floor layers, leading to mold and mildew formation. This not only reduces the material value of the caravan but also poses a serious threat to your health by opening the door to respiratory diseases. Therefore, ensuring that the vehicle you are going to buy is leak-proof is the most important investment you can make.
How Do Hidden Water Leaks Affect the Structural Integrity of the Caravan?
When water leaks from the joints of the caravan or from screw holes, it penetrates the fibers of the wooden frame. When wood gets wet, it expands and shrinks when drying; this continuous cycle leads to a loss of material strength and results in what we call "soft rot." When structural integrity is compromised, the caravan flexes while in motion, and this flexing further exacerbates existing leaks. Damage at the junction points of the roof and walls can cause the caravan to break apart like paper in the event of an accident or strong winds. Additionally, if leaking water comes into contact with the electrical system, it can create short circuits and increase the risk of fire. Early detection of hidden leaks is the only way to extend the life of the vehicle.
How Can We Detect Musty Odors in the Caravan?
The smell that hits your nose when you first enter the caravan tells you a lot about the vehicle's past. If there is a strong, earthy smell or a sharp moldy odor inside, this is definitely a sign of a moisture problem. Sellers may sometimes use strong room perfumes or detergents that give off a freshly cleaned air to mask this smell. Therefore, you should ensure that the caravan has not been ventilated for at least an hour before inspection and that its windows are closed. Take a deep breath by bringing your nose close to closed cabinet interiors, under beds, and especially in corner areas. If you smell something that burns your throat or a damp cellar odor, it is advisable to stay away from that vehicle; because this smell is often an indication of a deep rot.
How to Use Moisture Meters in Caravan Inspections?
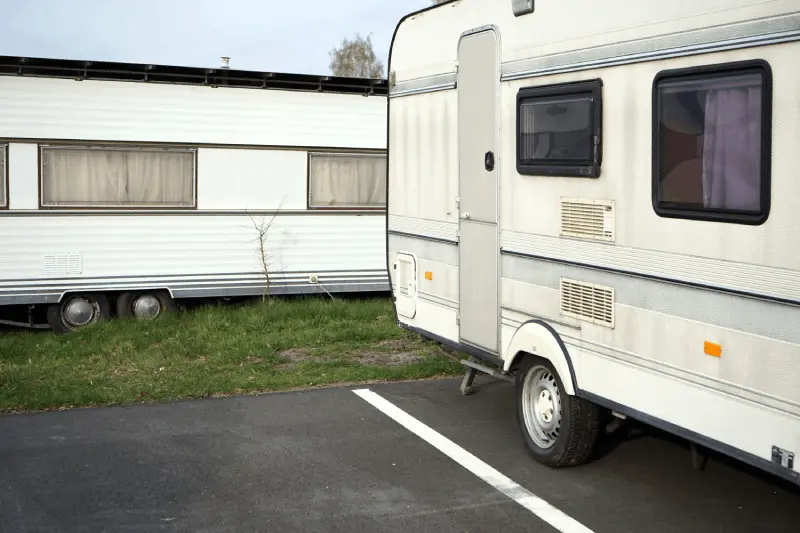
Moisture meters are the most critical tool you should have when buying a caravan. There are needle and non-needle (capacitive) models available. Non-needle models are generally preferred because they do not damage the surface. By holding the device against different points of the wall, you can numerically see the moisture level beneath the surface. In a normal caravan, the moisture level should be below 15%; between 15%-20% is "caution required," between 20%-25% indicates "possible source of leakage," and above 25% means "active leakage and serious damage." When taking measurements, you should especially focus on window frames, door fittings, roof vents (ventilations), and corner junction points. Taking several measurements from each corner and comparing the results will help you pinpoint the source of the leak.
Why Should the Mastics and Silicones on the Exterior of the Caravan Be Inspected?
The sealing elements on the outside of the caravan are the first line of defense against water entering. Over time, UV rays from the sun, temperature changes, and road vibrations cause these materials to dry out, crack, or separate from the surface. If the color of the mastics has faded, feels hardened when touched, or has formed gaps in places, it is inevitable that water will leak from that point. Especially check the sealing materials around the roof rails, corner joints, and service hatches by gently probing with your finger. If the mastic easily separates from the surface, this indicates that the vehicle has not been regularly maintained and that water may have leaked between the panels. These small cracks can be the starting point of thousands of lira worth of damage.
Do Roof Vents and Ventilation Windows Leak?
The ventilation units on the roof of the caravan are one of the most common places for leaks. These units require a large hole to be cut in the roof panel during installation, and if the sealing is not done correctly, water can flow in directly. Carefully inspect the inner frame of the roof vent; check for yellowing, water stains, or bubbling in the wallpaper around the frame. If there is a softness felt when touched on the inside of the roof, it indicates a leak.
It means that it has spread to the ceiling panel. Also, check the outer part of the hatch (if applicable) for any cracks on the plastic surface caused by sunlight. These cracks are microscopic and only appear when it rains, absorbing water like capillaries and transferring it to the inner layers.What Do Soft Spots on the Caravan's Floorboard Mean?
The floor of the caravan is usually made of marine plywood and insulation material. If you feel flexing or a "spongy" sensation in certain areas while walking on the floor, this indicates that the floorboard has absorbed water and is delaminating. Water can reach the floor from underneath the caravan (through the wheels' rotation) or by filtering down through the walls. It is very important to get underneath the caravan and inspect the floor with a flashlight. Especially check the back of the wheel arches and the hardness of the wood in the corners with a screwdriver (without causing damage). If the wood crumbles or sinks when you press it with your finger, the caravan's floor may need to be completely replaced, which is one of the most expensive repairs.
Are Bumps and Color Changes on the Wallpaper Signs of Leakage?
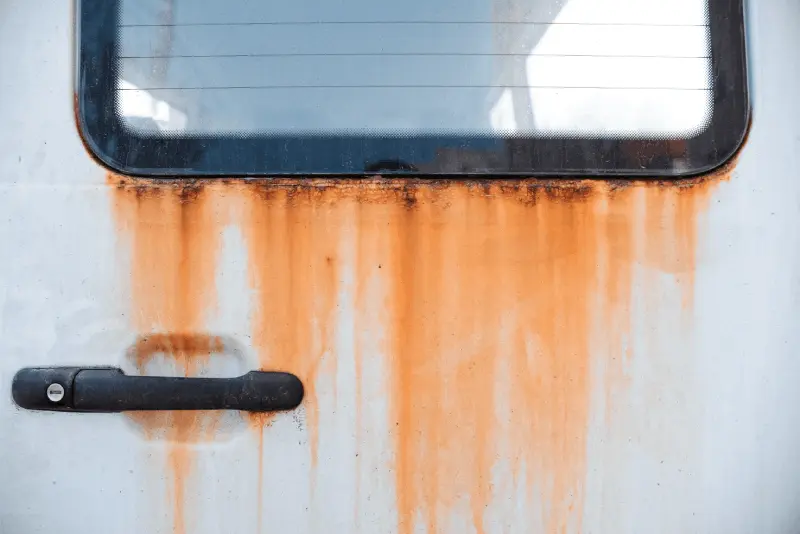
The wall panels inside the caravan are usually vinyl-coated. When a water leak starts, water enters between the wooden part of the wall panel and the vinyl coating. This causes bubbles, cracks, or a "puffy" appearance on the wallpaper. Look for such abnormalities especially in the lower corners of windows, furniture joints, and areas close to the ceiling line. Sometimes, water leaves black spots (mold) or rust-colored stains on the wall. Even if the seller says, "it's just an old stain, it has been repaired," definitely verify the current condition of that area with a moisture meter. Because even if the surface looks dry, the insulation material inside the panel may still be wet and continue to deteriorate.
Can Window Frames and Seals Be Leaking Water?
Caravan windows are quite prone to water ingress due to both the structure of the seals and the way they are installed. The seals can lose their flexibility over time and become "compressed," allowing rainwater to filter inside. Open the windows one by one and check for water pooling, mold growth, or dirt accumulation in the inner parts of the seals. Also, observe whether the seals are compressing sufficiently when you close the window. Test the inner panel just below the window with a moisture meter. If water is entering between the seals, this usually leads to the wood frame below the window rotting. Even small cracks on the seals can provide a sufficient pathway for liters of water to enter during heavy storms.
Why Are the Kitchen and Bathroom Areas of the Caravan Risky?
The water systems in the caravan are just as dangerous as external leaks. Leaks around the kitchen sink, shower tray, and toilet usually start from the inside. Check the hose connections under the sink by hand; look for any moisture or water droplets. Especially examine the integrity of the silicones around the edges of the shower tray on the bathroom floor. Since the caravan flexes while in motion, these silicones can easily separate, causing water to flow directly onto the floorboard when you take a shower. Also, definitely check the inside of the service hatch where the toilet cassette is located; water accumulating here can quickly lead to the rotting of the subfloor and the floor itself. "Clean" water leaks in these areas can cause damage faster than rainwater coming from outside.
Are the External Lighting and Accessory Mounting Areas of the Caravan Safe?
Solar panels, awnings, external lights, or bike racks added to the caravan later can be potential invitations for leaks. During the installation of these accessories, the caravan's body is drilled. If these screw holes are not properly sealed, water can seep through the screw into the heart of the panel during any rain. Check the mastic seals around the accessories. If the screw heads are rusty or there are dirty water stains around the accessory, there is a very high likelihood of a leak there. Inside the caravan, take moisture readings on the wall section directly aligned with the external accessory. Often, a small lamp screw that is said to "not be a problem" can initiate a deterioration that leads to the entire wall needing to be replaced over time.
How Do Wheel Arches and Fenders Lead to Leaks?
When driving, the water splashed by the wheels hits the underside of the caravan with high pressure. If the plastic parts of the wheel arches (fenders) are cracked or if the insulation at the point where they join the body is damaged, this water enters the junction point of the side walls and the floor from below. Such leaks are usually difficult to detect because they come "from below" rather than "from above." Check the bottoms of the upper cabinets inside the caravan and the walls. Hold your moisture meter close to the ground in these areas. If there is dampness in this area, it indicates that the caravan's insulation is defenseless against water pooling on the roads and that the floor has started to deteriorate from the inside out.
Why Is the Front Hitch and Storage Compartment of the Caravan Sensitive?
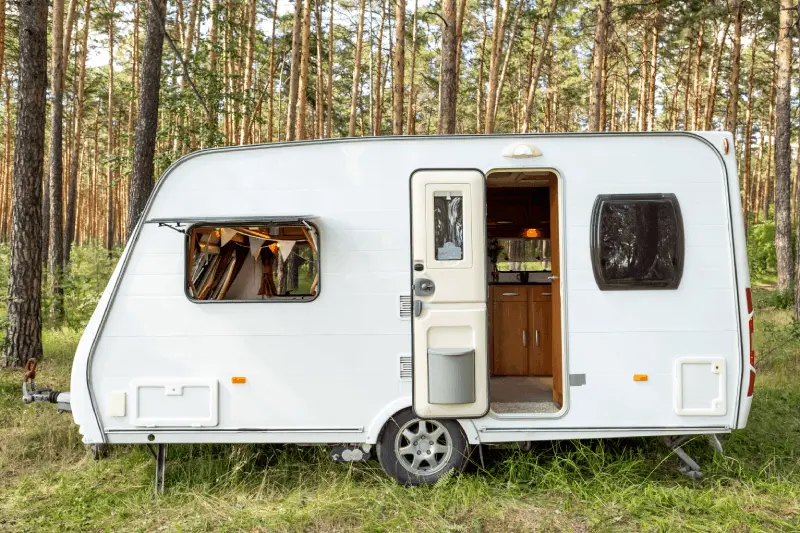
At the front of the caravans, there is usually a storage compartment (tube compartment) used for placing pipes and materials. The lid and seals of this compartment are the most exposed to the harshest impacts of wind and rain. If the front storage compartment is leaking water, this water usually seeps into the area where the caravan's main body meets the front panel. Empty the front storage and carefully inspect the corners. Check for puddles on the floor or discoloration on the wood. Also, press down on the inner panel beneath the front window with your hand; if you feel any softness, it means that the leak has seeped from the front storage into the bed or under the seating area. This area is always at high risk for leaks as it is most exposed to the aerodynamic pressure of the caravan.
How to Identify Hidden Leaks Under Awning Rails?
The aluminum corner rails that connect the roof of the caravan to the side walls are the key to the vehicle's watertightness. Under these rails, there is usually a sealing material called "butyl tape." If this material has dried out, it will start to allow water to seep in through the rail. The leak usually starts from the roof and descends down through the wall panels, so you may not see any wetness on the surface. However, if you measure along the line where the roof meets the side wall with a moisture meter, you may encounter values above normal. There is a plastic strip over the screws of the corner rails; gently lift this strip to check if the screws are rusty, which will give you a clear idea of whether the insulation beneath the rail has deteriorated.
Is It Necessary to Perform a Caravan Inspection with a Thermal Camera?
Some details that traditional moisture meters cannot detect can be captured by thermal cameras. A thermal camera shows the temperature differences on the surface. Water retains heat differently than other materials, so damp areas behind the wall appear as "cold spots" (usually dark blue or purple) on the camera screen. This method is especially excellent for seeing moisture lines that have not yet surfaced but continue to spread, particularly under wallpaper. If you are having a professional caravan inspection done, be sure to ask the expert whether they are using a thermal camera. This device allows you to visualize deficiencies in the caravan's insulation and hidden water pathways, enabling an analysis that is impossible to do with the naked eye and can save you from significant expenses.
Can Paint or New Wallpaper Cover Up Hidden Damage?
If the caravan you are inspecting has only one wall that has been freshly painted or a specific area that has been fitted with different wallpaper/decorative paneling, this situation is a cause for "alarm." Sellers sometimes perform superficial repairs to hide the stain or mold left by a water leak. Always keep a moisture meter handy for these suspicious areas and compare the wall's hardness with intact areas. If the panel beneath the new covering is still soft or the device shows high moisture, it means that only a visual makeover has been done without drying the source of the leak. Any point in the caravan where originality has been compromised could indicate an underlying structural problem; therefore, do not hesitate to question the reasons for aesthetic changes.
What Do the Caravan Service Records Indicate for Moisture Control?
A well-maintained caravan should have a regular "Watertightness Test" (Damp Test) performed every year. Request the reports of these tests from the seller. If the moisture reports in the caravan's history are clean and have been conducted regularly every year, this is an indicator that the vehicle has been well-maintained. However, if there are areas with high moisture reported in previous years, ask how these areas were repaired. A patch that has not been done professionally may only have postponed the problem. If the vehicle has no service records at all and the seller claims it "never leaks," you should be twice as thorough in your inspection. Remember that the likelihood of leaks in a caravan that has not received regular maintenance is 80% higher than in a well-maintained vehicle.
Is It Advantageous to Inspect the Caravan on a Rainy Day?
If possible, inspecting the caravan while it is raining heavily or immediately after the rain provides you with a significant advantage. You can visually see active leaks while it is raining. You can check whether water is dripping from the roof seams and whether moisture is accumulating at the bottom of the windows. You also have the opportunity to observe how the water outside is draining and whether water is pooling in the roof rails. If the weather is sunny, you can perform a similar test by applying "artificial rain" to the caravan with a garden hose. Hold the hose with water particularly on the window seals, door edges, and roof joints, then enter and wait for 15-20 minutes to check for any leaks.
Why Should You Check Under the Caravan's Interior Furniture?
Caravan leaks often hide behind or beneath the furniture. Lift the sofa cushions and inspect the wooden base underneath. Shine a flashlight into the voids under the kitchen cabinets. Water leaks flow down due to gravity and accumulate in the corners where the furniture meets the wall. If the furniture particle board has absorbed water and swelled, this is evidence of chronic leakage in that wall. Also, check the walls in the corners of the storage compartments under the bed with a moisture meter. These areas tend to accumulate moisture due to poor air circulation, and mold formation begins most rapidly in these spots. Just because the furniture looks "clean" does not mean the wall is sound; always check the bottoms.
What Critical Questions Should You Ask the Seller When Buying a Used Caravan?
Asking the right questions helps you understand the seller's honesty and the actual condition of the caravan. Questions like "When was the last moisture test performed on the caravan?", "Has it ever had a water leak repair?", "When were the seals last replaced?", "Where was it stored in the winter?" are of vital importance. If the caravan has been stored outdoors in the winter without being covered, the risk of leaks increases due to the freezing and thawing cycle. Do not be fooled by the seller's claims like "there was a small stain, we fixed it"; ask how it was fixed. You detailed, which material did you use?" elaborate. Repairs made with household silicone instead of professional service mean a bigger disaster for the caravan in the long run.
What is the Relationship Between the Caravan's Electrical System and Water Leakage?
Water leaks not only damage the furniture but also jeopardize the caravan's 12V and 220V electrical systems. Cable channels running through the walls create an ideal path for leaking water to flow. Check for moisture around the electrical control panel or at the base of outlets. If you see darkening around an outlet or oxidation on plastic parts, this indicates that water is leaking inside the wall and the cables are corroding. Wet electrical systems can lead to fire risks as well as damage to your electronic devices. Therefore, when checking for moisture, you should also evaluate electrical outlets and light switches as potential indicators of moisture.
What is Delamination and How Does It Affect the Value of a Caravan?
Delamination is the separation of the layers that make up the caravan wall or floor (outer fiber/aluminum, insulation foam, and inner panel). This usually occurs as a result of water intervening and breaking down the adhesive. If you lightly tap the wall from the outside and hear a "hollow" or "thudding" sound instead of a "solid" sound, it means the outer layer has separated from the insulation inside. If the panel flexes when you press against the wall inside, that is also delamination. A caravan with delamination has structurally weakened and its repair is very labor-intensive; the panel may need to be completely stripped and rebuilt. The market value of a caravan with this issue should be at least 30-40% lower than that of a sound one.
How Does Mold Formation in a Caravan Affect Your Health?
The most insidious result of hidden leaks is the growth of black mold, such as "Stachybotrys," inside the walls. Since caravans are small and enclosed spaces, the spores released by these molds mix with the air and can enter your lungs while you sleep. If you experience itching in your eyes, coughing, or shortness of breath after staying in the caravan, there may be a serious mold problem in the vehicle. Mold is not just a cleaning issue; it is a sign of a structural disease. Living in a damp caravan can lead to long-term chronic health problems, especially for children and those with allergies. Therefore, you should view moisture control not just as a "material inspection" but as a "health check-up."
Should You Get Professional Appraisal Support When Buying a Caravan?
If you are buying a caravan for the first time or do not feel completely confident in technical matters, getting a professional caravan appraisal service can be life-saving. Experts can detect microscopic cracks, structural irregularities, and hidden moisture spots that you might overlook with advanced devices. The appraisal fee is a small price compared to the thousands of lira in repair costs that may arise later. Although caravan appraisal is not yet very common in Turkey, it would be the most logical move to take your vehicle to an experienced caravan manufacturer or authorized service for a comprehensive moisture test. An "acceptable" approval from an expert eye guarantees you peace of mind while sleeping in your caravan.
Is It Logical to Repair a Damp Caravan?
If moisture has emerged in the caravan you like and the price is very reasonable, you might think, "I can fix it myself." However, caravan repair is not like home renovation. When you open the wall panel, there is a 90% chance that you will encounter much larger damage than you expected. The repair process involves removing the outer cladding, replacing the damaged wooden skeleton, renewing the insulation, and covering the inner panel, which can take months and requires special equipment. If you are not a professional caravan craftsman or do not have a large budget and patience to dedicate to this work, it is best to stay away from a damp caravan. Often, a "cheap" damp caravan ends up costing more than a sound one in total expenses.
How Does the Winter Storage of the Caravan Affect Its Moisture Condition?
How the caravan is stored during the winter months determines the moisture balance inside. In caravans that are not used in winter but have no airflow inside, moisture can form through "condensation." Human breath, cooking steam, and the difference in outside temperature create water droplets on windows and walls. If this water is not dried, it can cause mold behind furniture. Learn whether the vehicle you are going to purchase has been ventilated during the winter and whether dehumidifiers have been used. In a well-maintained caravan, ventilation vents are kept open even during winter sleep. If the caravan has been completely closed and stayed in a damp area throughout the winter, it may have suffered significant moisture damage even without leaks.
What is the Best Time Frame for Moisture Control?
The ideal time for caravan inspection is immediately after a rainy period or early in the morning. In the morning hours, since the humidity in the air has not yet dispersed, you can more easily see cold spots and condensation traces on the walls. Additionally, with the warming of the caravan in the sun, the smell of vapor from the damp areas inside becomes more pronounced. When it is warm outside, the inside of the caravan heats up quickly, causing surface moisture to dry rapidly, and moisture measuring devices can give misleading results. If possible, check the vehicle after running the heater (webasto or truma) for a while in both cool outdoor air and inside; the heat will reveal the smell and effects of hidden moisture.
Is the Leakage Risk Lower in New Generation Fiber (Monoblock) Caravans?
>Caravans with a monoblock or single-piece fiberglass body are much more resistant to leaks compared to traditional caravans because they have no joints. However, this does not mean that they "never leak." Water can still enter through windows, doors, service hatches, or roof vents. When purchasing a monoblock caravan, you should also meticulously perform moisture control. If there is a leak in these vehicles, water can be trapped inside the body for a longer time, and it may take longer for you to notice the damage. A single-piece body is an advantage, but a poorly insulated window can completely negate this advantage. Therefore, regardless of the body structure, you should never compromise on your inspection discipline.
How to Prepare a Moisture Control Checklist for Your Caravan?
It is very easy to get excited while inspecting a caravan and forget some points. For this reason, always have a written checklist with you. At the top of the list; there should be roof corners, window sills, door thresholds, under the beds, under the kitchen sink, bathroom floor silicones, and external accessory mounting points. After checking each point, mark it and note the moisture meter readings. These notes will help you compare different caravans and make a logical decision. Acting with data instead of emotions will save you from a "money trap." Remember, the inside of a shiny caravan can be rotten; your checklist is your greatest guide.
How to Negotiate the Sale Price of a Caravan with a Moisture Problem?
If you really like a caravan but have detected a small moisture problem, you can use this situation as a strong bargaining chip at the negotiation table. Ask a professional service about the repair cost of the detected damp area and request to deduct this amount from the sale price. However, you must be honest here: If the moisture has spread to the skeleton of the caravan, no discount is worth taking that risk. Only negotiate if there is a localized and newly started leak (for example, just a window seal issue) and the repair is easy. Otherwise, the significant discounts offered by the seller may actually be an attempt to cover up a major problem. When you say "I bought it cheap," you might actually be purchasing an endless repair process.
How Should You Continue Moisture Control After Becoming a Caravan Owner?
Buying a caravan in a safe and dry condition does not mean the job is done. The caravan needs maintenance during its usage period. Make it a habit to conduct a comprehensive moisture test at the beginning and end of each year. Check the external seals every two years and renew them with professional materials (Sika or equivalent butyl sealants) if necessary. When you are not using your caravan, leave the windows in "micro ventilation" mode and use moisture-absorbing devices. Preventing or catching leaks early will extend the life of your caravan for decades. Remember, caravanning is not just about traveling; it is also the art of protecting your vehicle against nature's harsh conditions.
Why Is It Vital Not to Compromise on Precautions When Buying a Caravan?
Ultimately, it is difficult to find a "perfect vehicle" in the caravan world, but it is possible to find a "healthy vehicle." Hidden water leaks and moisture are the most insidious disasters that can happen to a caravan. Being patient, using the right equipment, and meticulously examining the critical points outlined in this guide will protect you from disappointment. The extra few hours of inspection you dedicate when buying a caravan will return to you as years of trouble-free and enjoyable moments. Remember, the road to freedom is not through wet and rotten ground, but through a solid and dry caravan. To avoid sinking your dreams, keep that water away from your caravan.